

Posts by beli1910
-
-
-
-
Amiko Plugins
OSCam_ymod for Sparkoscam-ymodv18-t33_plugin
-
04-07-2012
update with last oscam ymod 18 t33 also script auto update oscam.k*ys, oscam version 6801 and more
-----------------Note 04-07-2012-------------------
- update mcas
- update last version spcs
- update oscam-ymodv18-t33
- Update file oscam_ymod ( C+Nl,ORF,TNT FR HD ALL OK )
- Add new Script Auto_Update_Oscam.keys
- New version of Oscamd.sh4 6801
- Update spcs 2.5.76Code
Display MoreORF HD 2012/07/04 8:42:39 1830 2B6C94C8 c user1 (0D05&000004/132F/00DC/0000/9C:61B4/59-0E): emu (209 ms) 2012/07/04 8:43:09 1830 2B6C94C8 c user1 (0D05&000004/132F/00DC/0000/9C:6D29/13-E1): emu (204 ms) C+ NL 2012/07/04 8:45:06 1830 2B6C94C8 c user1 (0622&000000/0FAC/0568/0002/34:CEF9/39-2A): emu (219 ms) 2012/07/04 8:45:11 1830 2B6C94C8 c user1 (0622&000000/0FAC/0568/0002/34:9714/39-F1): emu (221 ms) TNT HD 2012/07/04 8:45:52 1830 2B6C94C8 c user1 (0500&030B00/245E/1A2D/0000/142:CF4C/B0-26): emu (207 ms) 2012/07/04 8:45:58 1830 2B6C94C8 c user1 (0500&030B00/245E/1A2D/0000/142:2EFE/B0-1F): emu (211 ms)installation:
* Extract to usb
* Plug usb in spark box
* Popup message appear, confirm upgrade
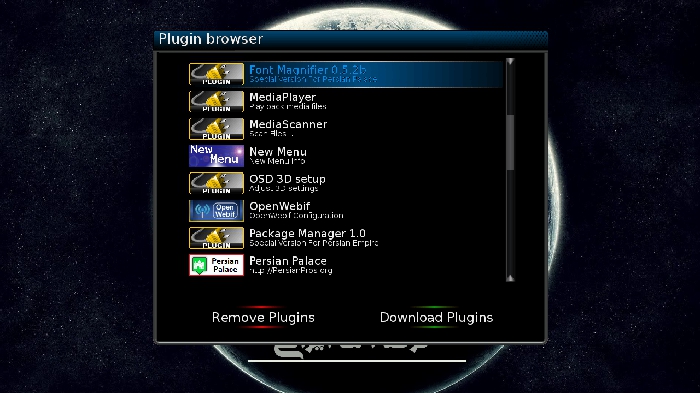
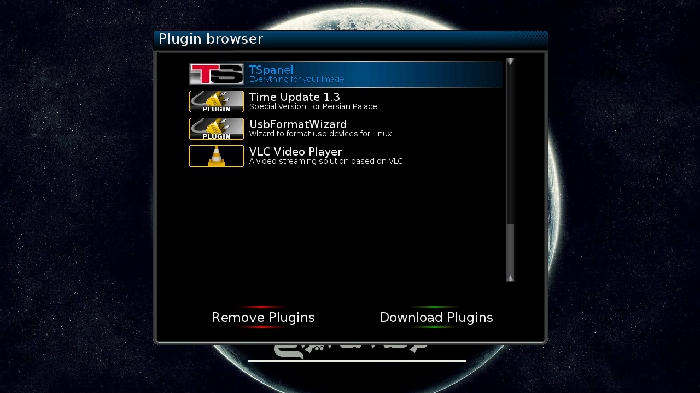
* Goto plugin menu in spark app and press ok
* Exit spark menu
* Visite our web site for updateby Tigretunisie
-
Amiko Plugins
New plugin 2012.07.12
1.update spcs from 2.5.63 version to 2.5.78 version
2.Oscam4spark_tools,new navigation OSD for oscam
3.update mcas to 1.0.10 version.
4.Add plugin_avatar_iptvactive.s for webtv update new list from webtv server -
Lattest PluGiN
26.07.2012
-
Amiko Plugins
Amiko Alien 8900 Spark Plugin Novoe TV
60 Best Russian,Ukrainian,Georgian and Armenian channels
Register online"new-rus.tv"and see all the channels
the first two weeks for free.
After that, you always 6 channels for free,
and after a year of watching this number is doubled -
Oscam watchdog= Plugin
This plugin solves a common problem among those who maintain a server
Spark Oscam a picture! namely blocking the server after
incidents ... generally the nature of power that lead to states
transient behavior of the router and therefore unpredictable
network interface. This plugin tests every 30 seconds,
time can be changed! but this value is preferable to not
directed system increases, Oscam state, if it works ... out and
wait again 30 seconds ... otherwise restart Oscam.- Required parameter "autostart"
- This executable / var / bin / oscam=================Ro====================
Acest plugin rezolva o problema cunoscuta celor care intretin un server
Oscam pe o imagine Spark !!! si anume blocarea serverului in urma
unor incidente ... in general cele de natura electrica care duc la stari
tranzitorii ale routerului si ca urmare comportamente imprevizibile pe
interfata de retea. Acest plugin testeaza odata la 30 de secunde ,
timpul poate fi modificat ! dar este preferabila aceasta valoare pentru a nu
creste regia sistemului , starea Oscam , daca el functioneaza ... iese si
asteapta din nou 30 de secunde ... altfel restarteaza Oscam.- parametru necesar "autostart"
- prezenta executabilului /var/bin/oscam -
10.08.2012.
-active/next Buls@t key
-RAI august/september key -
[h=1]Engel RC5320 HD Combo/Nytrobox 6000 HD Combo_Keys[/h]
-
Process Lasso 6.0.0.78
CodeFix GUI Fix rare crash of the GUI seen by some while in Active Processes tab Fix Activator Newly activated users were being presented with activation revalidation in some cases Addition GUI Added option to change licensed user name (in About Box of licensed copies) Change GUI Adjustmensts to About Dialog controls Change GUI Changed bitmaps to new PL images by Jennifer Cripps Change All Re-enabled minidumps as opposed to self-recovery, as we want to know of any critical error - not just recover from it Change Finnish Updated translation Change Italian Updated translation Change German Updated translation -
Latest Version Process Lasso
-
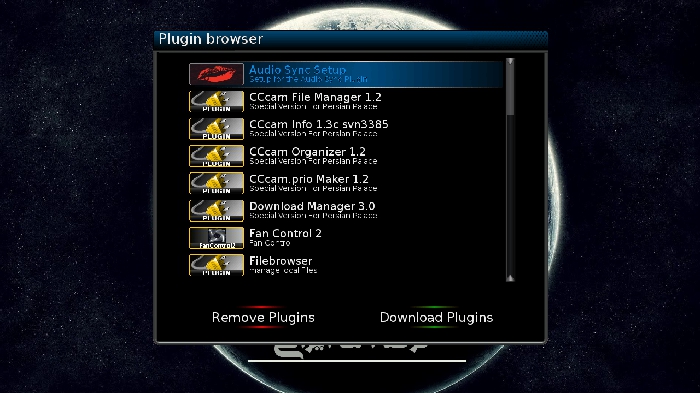
PersianEmpire_DM800se_SSL87F-RC_lite_belami
"Persian Empire" Enigma2 Images For DM800se
Project Name : Persian HD Project (PHDP)
Image Name : Persian Empire
Panel : Persian Palace - New Generation (RC)
OE : Open PLi 2.1 PE Mode - OE 1.6
Kernel : 2nd Generation PE Mode
Enigma2 : 3 August 2012 (PLi)
Release Type : RC (Release Candidate)
Release Date : 3 August 2012 -
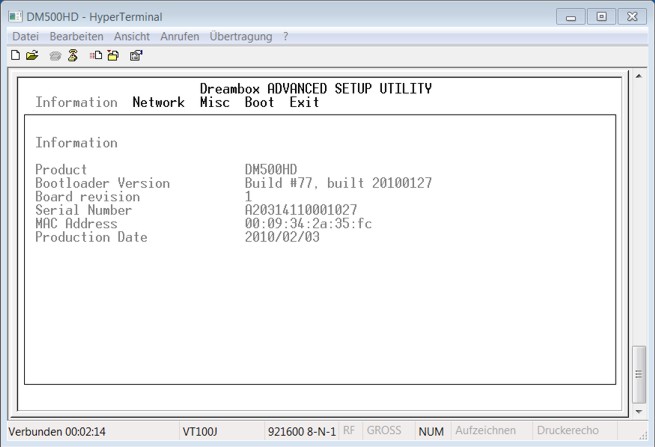
DM500 HD - manual IP
Setup a manual IP address in the bootloader:
OK, you don't have an DHCP server. That's normal if you don't have a router or configured one by yourself. You don't need to install one, but you need to connect your Dreambox by a USB cable now.
You need to know which IP to give to your Dreambox. If you don't know which IP to choose, please ask someone who can help you. You can choose any IP which is "near" your PC's IP address, but the IP should not be used by any other device.
For example, if your PC's IP is 192.168.0.5, you could use 192.168.0.10, unless another device already uses that. In that case, just choose 192.168.0.11, or whatever. It just needs to be in the 192.168.0.x range, where x is >= 1 and <= 254.
Start your favourite terminal program, for example HyperTerm. Setup your Comport to 115200/8N1. Press the "s" key.
Now a setup menu should appear. It should look similiar than the screenshot below.
Press the right arrow. You are now in the network setup menu.
Using "+" or "-" you can set the "Network type" to "manual".
Now you can enter an IP address in below. Press F9 to save your settings.
The Dreambox will shutdown.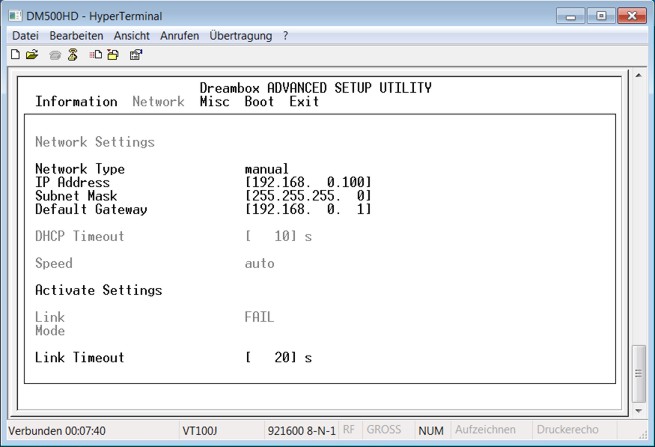
Now go back and to the procedure again. "dhcp" shouldn't appear anymore, instead the IP you entered.
-
DM500 HD Flashing firmware by Browser
Flashing a new firmware by Browser
What you need to flash
You need the image file you want to flash. Image files have the extension *.nfi. You can't flash other
images like *.img files. Don't try it - it won't work.
You need either a DHCP server and a configured bootloader
You need a browser and a network cable. Connect your Dreambox to a switch/hub/router in your lokal LAN.
To flash a new image, you can use the second stage loader. It must be present and not broken.
The following steps assume you have a DHCP server.
If you don't have one, you have to setup an IP address (klick) in the bootloader's serial setup.
- Power down the Dreambox, either using "shutdown" and by switching off by the power switch.
Standby is not enough!- - (1.) Press and hold the power button.
- (2.) Switch on your Dreambox.
- (3.) Your Dreambox will get the next free DHCP IP address from your router.
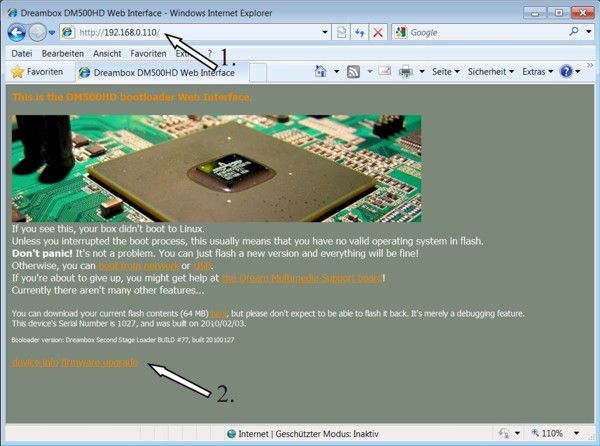
- - Now, open a browser on your PC.
(1.) enter in the address line "http://ip/" .
- (2.) on the bottom of the page, there's a link called "firmware upgrade". Click it.
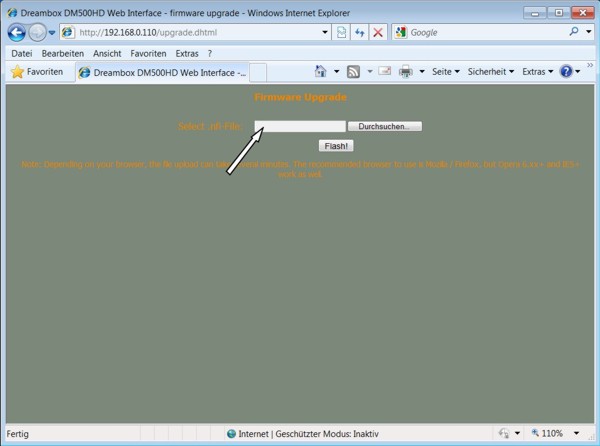
- On the next page, you can select the flash image you want to flash. be sure that it has the ".nfi" extension.
You can't flash other images (like .img)!
- Click on "FLASH!" and wait. It might take some time to upload and flash the image.
- Switch the box off again, and on again. The new image should be flashed and working. - - (1.) Press and hold the power button.
-
DM500 HD Flashing with DreamUp
How to flash your Dreambox DM500 HD with DreamUp
Check the Network for faster image transfer approximately 3-4 minutes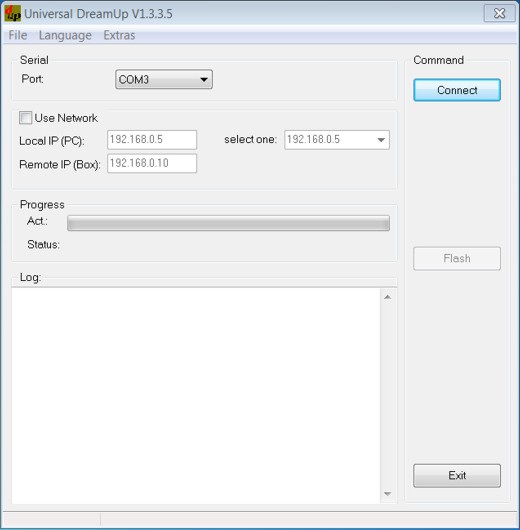
First disconnect the box from main power
start the program "DreamUp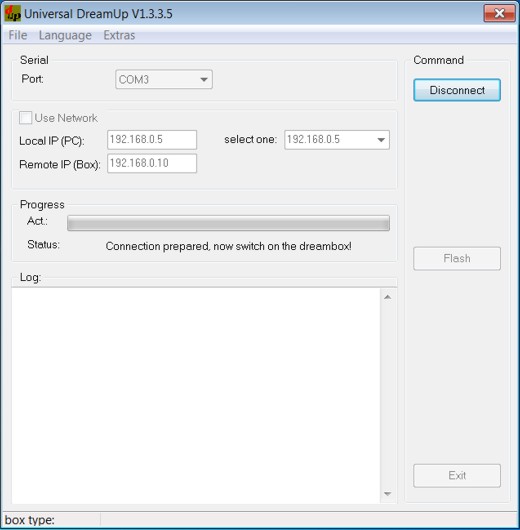
select your comport
maybe use network
if network: enter the local IP from your PC, enter a remote IP for your Box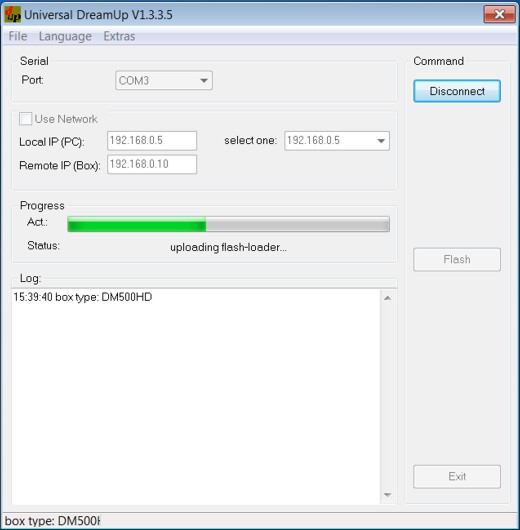
press the "Connect" - button
and then connect the box to main power
please wait nowafter the flash loader is transfered into the Box select the firmware by pressing
the "Flash" - button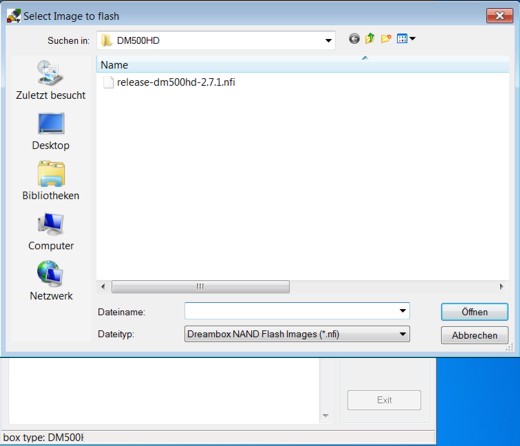
select the firmware and click "open"
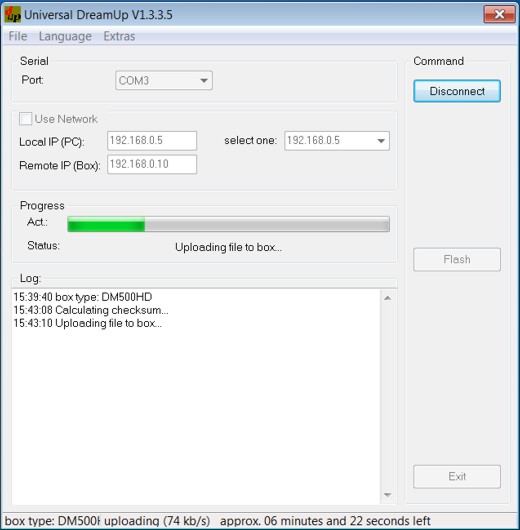
upload starts now, please wait
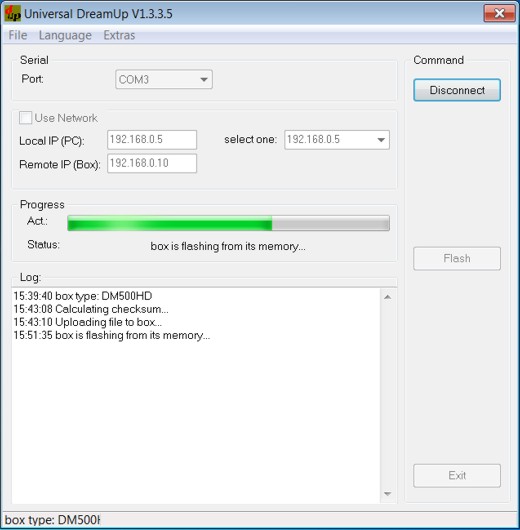
Box is flashing the new firmware into the flash memory, please wait
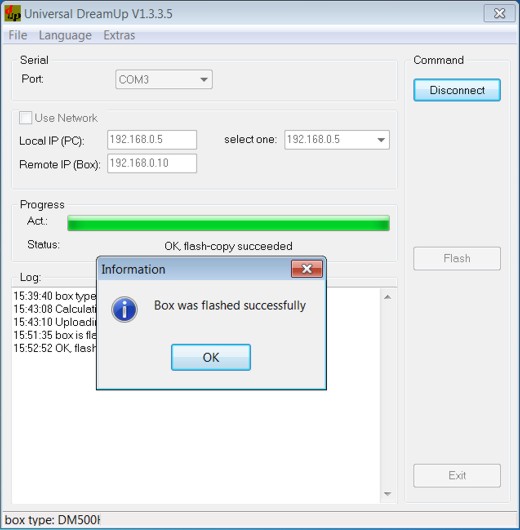
flashing done, press "OK"
press "disconnect then exit"
restart the box -
Entering the Image Dreambox 500HD with Mini USB cable - Tutorial
First Mini USB male to male USB & Cat5 Network Cable
1Potreban you a mini-USB cable like the picture below
Installing the USB DreamUP
On the back dm500hd Mini has a USB port / USB: To load firmware to dm500hd you must use a standard USB cable that one side has a USB port and mini USB connector on the other hand:
For now, do not connect the USB cable to your computer.
Turn dm500hd button and move to OFF:
If this is the first time you connect your Dreambox to your PC with a USB cable ", then you need to first install drivers or dm500hd will be" recognized.
Download USB Driver dm500hd and unzip the zip file to a folder on your computer.
- Now install the drivers.
-Open the folder and click on the exe PreInstaler.
-Confirm by clicking "Install":If all goes well, after a few seconds you will receive a confirmation message:
# Now, again with dm500hd off, connect the USB cable to the computer and with that you automatically finish installing the driver:
# Before you can use DreamUP have to see which COM port is' assigned to serial converter / Dreambox USB, then go to "Control Panel", then "System" and then "Advanced System Settings"
Now go to "Hardware" tab and click on "Device Manager":
Go to the "Ports (COM & LPT)" and you will see that the assigned COM "SFE RS232 to USB Controller" in my case and "COM7:
At this point the USB drivers instalirani.A you know who is assigned to COM. But missing one more thing before we start koristtit DreamUP. And it means' IP addresses dm500hd. If you know there koji'IP Dreambox can skip this part and go straight to DreamUP, but if you do not know the IP address of the process is much slower. To be precise, DreamUP can be used without activating the "Use Network" and therefore do not need to know the IP Dreambox, but without it, the firmware will be loaded only through the serial is very 'slow, so you need more "thirty minutes, but if Network and use the firmware is loaded and uses a network connection it takes a few minutes.
Here is a little lower, you can download the drivers
Here's another link with pictures and tutorial in Italian, which help if:In:
Code[URL='http://www.dreambox.it/guide_installare_fw_in_flash_500hd.htm']Dreambox.it - Il Top dei decoder Sat![/URL]Usb dm 500hd driver
-
sim2-persianempire-lite-beta3-Sunray sr4 ready-ssl84b-by sat4fun

For clones Sunray sr4 or DM800se sim2.10 ONLY
installation in internal flash or in multiboot
Thanks to "Persian Empire" for very good Image
Drivers latest original Second stage loader 84b
Ts Panel
Ts Flash Backup 84.2
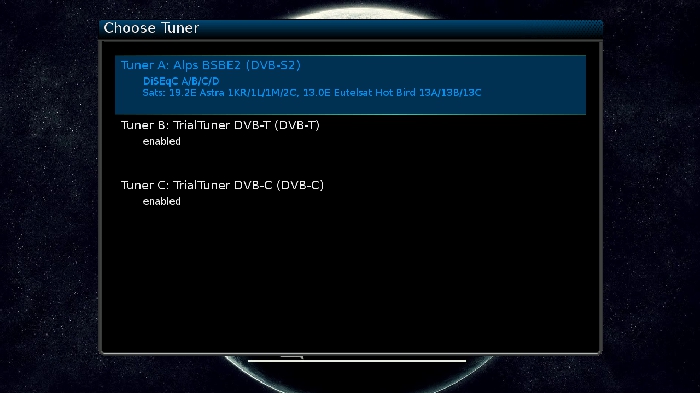
Trial Tuner


-=Download Link=-
[TABLE='class: cms_table']
[tr]
[/tr]
[TD='class: cms_table_alt2'][/TD]
[/TABLE]https://hotfile.com/dl/165800052/e5d...t4fun.rar.html
Do not forget saving your settings from software manager before flashing any new image
Sat4fun The Satworld Together
-
