Softcam 0.1.38 to PrismCube
For Software ver. 1.2.0 and higher.
Changelog:
version 0.1.38
- new oscam binary r9705
- modified "oscam-premiere-s02" files of "DE market" (german market) folder


Softcam 0.1.38 to PrismCube
For Software ver. 1.2.0 and higher.
Changelog:
version 0.1.38
- new oscam binary r9705
- modified "oscam-premiere-s02" files of "DE market" (german market) folder
PrismcubeManager_0.0.19. zip PrismcubeManager_0.0.19.zip (2.02 MB, Download
Gigant Addons Pack for PrismCube Ruby ver. 2.6 to webkurier
Gap2.6 is for the official version DEV1.7.3
As a bonus, I've added the ability to install gap in the black hole 1.7.3. To do this, rename the files: / usr/share/xbmc/addons/script.mbox/resources/skins/Default/720p/SingleRootWindow.xml on SingleRootWindow.xml-orig, then SingleRootWindow.xml-bh on SingleRootWindow.xml and restart the gui

What 's new?
- Updated skin for section PVR
- Updated Polish translation
================================================== ===
NOTE !
Gap does not contain keys or emulators !
After each change of a skin must restart the GUI.
The author is not liable for any damage to the equipment .
To restore the default settings, change the name of the folder / usr / share / xbmc / addons / script.mbox / resources / skins / Default_old to Default
================================================== ====
The installation gap :
1 file gap_prismcube_x.x.tar.gz copy on a memory stick, insert the USB and turn on the receiver .
2 Start the telnet or SSH session in PuTTY (port 22 , user : root , password: 0000) and install using the following command (copy - paste) :
where sdb1 is normally a mounted USB stick - check with each other in what is the number and possibly replace the name of the correct
HOW- PrismCube XBMC Cleaning We recommend: Resetting XBMC to clean and super configure it using the new Addon Wizard in 5 minutes
October 5, 2013 by XBMCHUB.COM Staff
If you installed XBMC add-ons HUB before October 5, 2013 , we recommend immediately after this tutorial ! This will ensure that the configuration of XBMC pozostająbezpieczne and running configuration , free from any possible security issues that have recently been revised . You will also have to work SportsDevil supplement , as well as a new version of the wizard addon tool.
For the best possible configuration of XBMC , you can not rely on a configuration that has yet to reminisce with additives that have not worked in months . We strongly recommend that those who use XBMC for viewing purposes only additives boldly follow this process at least once every six months. It gives a perfect XBMC configuration if you want to have a nice setup XBMC , which gives the greatest possible pleasure, with all kinds of up-to -date add-ons modernized working and gadgets.
After this very simple process that can track nawetmałpa , you'll be left with a nice , clean, error-free configuration of XBMC with all the best supplements , some of which you may already know , those that are likely to be new and exciting to discover. You will learn a whole new world of beautifully customized configuration of any value XBMC addon , tweak and fix built in, so no technical work left to do on the part at all.
LINKS : RESET XBMC to its original condition and super configure it using the new built- in Wizard five minutes
needs
Frodo version of XBMC ( if you do not upgrade to Frodo first using the normal installation procedure )
icon9 recommend : Reset XBMC to clean and super configure it using the new Addon Wizard in 5 minutes
Part One - Reset XBMC for purity
NOTE : If you have already configured Fusion Installer on your system, go ahead and skip to step 9 the first part of this guide.
NOTE: You must restart the computer after the process is complete , you should be ready to do this before starting the process .
Step 1 : Go to " File Manager " tab under " System " in the menu .
Screen shot 2013 10 05 at 1.51.12 PM We recommend: Resetting XBMC to clean and super configure it using the new Addon Wizard in 5 minutes
Step 2 : Click the " Add Source " to the left . If you have jużInstalator Fusion configured , go to step 9 of this guide.
Screen shot 2013 10 05 at 1.51.28 PM We recommend: Resetting XBMC to clean and super configure it using the new Addon Wizard in 5 minutes
Step 3: Select the top text entry field and type " [url ] http://fusion.xbmchub.com [/ url ] " (without the quotes ) in it , then press the "Done" button on the left side of the keyboard.
Screen shot 2013 10 05 at 1.51.32 PM We recommend: Resetting XBMC to clean and super configure it using the new Addon Wizard in 5 minutes
Screen shot 2013 10 05 at 1.51.47 PM We recommend: Resetting XBMC to clean and super configure it using the new Addon Wizard in 5 minutes
Step 6: Select the text input field and the bottom of " fusion" (without quotes ) in it by pressing the "Done" button again when finished.
Screen shot 2013 10 05 at 1.51.50 PM We recommend: Resetting XBMC to clean and super configure it using the new Addon Wizard in 5 minutes
Screen shot 2013 10 05 at 1.51.55 PM We recommend: Resetting XBMC to clean and super configure it using the new Addon Wizard in 5 minutes
Step 7 : Press the "OK" button in the bottom of the " Add Source Files " to save it .
Screen shot 2013 10 05 at 1.51.58 PM We recommend: Resetting XBMC to clean and super configure it using the new Addon Wizard in 5 minutes
Step 8: Check the " Fusion " easy add-on installer will be displayed in the window and then return to the main menu.
Screen shot 2013 10 05 at 1.52.04 PM We recommend: Resetting XBMC to clean and super configure it using the new Addon Wizard in 5 minutes
Step 9: Click on the "Settings" tab under " System " in the menu .
Screen shot 2013 10 05 at 1.52.12 PM We recommend: Resetting XBMC to clean and super configure it using the new Addon Wizard in 5 minutes
Step 10: Select the "Extras" tab on the left side of the vertical menu bar.
Screen shot 2013 10 05 at 1.52.18 PM We recommend: Resetting XBMC to clean and super configure it using the new Addon Wizard in 5 minutes
Step 11 : Select " Install from zip file " feature of the auction.
Screen shot 2013 10 05 at 1.52.22 PM We recommend: Resetting XBMC to clean and super configure it using the new Addon Wizard in 5 minutes
Step 12 : Open the "fusion" folder , which is given on the right side .
Screen shot 2013 10 05 at 1.52.25 PM We recommend: Resetting XBMC to clean and super configure it using the new Addon Wizard in 5 minutes
Step 13 : Select the folder " hubwizard " from the auction .
Screen shot 2013 10 05 at 1.52.29 PM We recommend: Resetting XBMC to clean and super configure it using the new Addon Wizard in 5 minutes
Step 14 : Click on the " plugin.video.freshstart - 1.0.2.zip " to install the necessary addon.
Screen shot 2013 10 05 at 1.52.32 PM We recommend: Resetting XBMC to clean and super configure it using the new Addon Wizard in 5 minutes
Step 15 : Return to the main menu , then go to the " extras" tab under " Programs" menu .
Screen shot 2013 05 26 at 3.50.45 AM We recommend: Resetting XBMC to clean and super configure it using the new Addon Wizard in 5 minutes
Step 16 : Click on the addon called " XBMC Fresh Start" to do it.
Screen shot 2013 10 05 at 1.53.04 PM We recommend: Resetting XBMC to clean and super configure it using the new Addon Wizard in 5 minutes
Step 17 : When prompted, press " Yes" to confirm the process .
Screen shot 2013 10 05 at 1.53.13 PM We recommend: Resetting XBMC to clean and super configure it using the new Addon Wizard in 5 minutes
Step 18 : It will only take a moment , and you will see the word " Done" appears in the window when finished.
Screen shot 2013 10 05 at 1.53.18 PM We recommend: Resetting XBMC to clean and super configure it using the new Addon Wizard in 5 minutes
Step 19 : Return to the main menu and restart the device to the changes that take place.
Screen shot 2013 10 05 at 1.53.32 PM We recommend: Resetting XBMC to clean and super configure it using the new Addon Wizard in 5 minutes
Step 20 : Relaunch XBMC and get some fresh air in the clean install XBMC , that is as good as new.
Screen shot 2013 10 05 at 1.54.09 PM We recommend: Resetting XBMC to clean and super configure it using the new Addon Wizard in 5 minutes
Part Two - Super Configuration Wizard XBMC XBMC HUB Addon
Step 21 : Go to the " File Manager " in the " SYSTEM" .
Screen shot 2013 05 26 at 3.49.11 AM We recommend: Resetting XBMC to clean and super configure it using the new Addon Wizard in 5 minutes
Step 22 : Select the " Add Source " on the left side of the window .
Screen shot 2013 05 26 at 3.49.17 AM We recommend: Resetting XBMC to clean and super configure it using the new Addon Wizard in 5 minutes
Step 23 : In the top box labeled labeled " Enter the path or browse for the media locations " enter " [url ] http://fusion.xbmchub.com [/ url ]" without quotes , then press the "Done" button on stroniena screen keyboard .
Screen shot 2013 05 26 at 3.49.21 AM We recommend: Resetting XBMC to clean and super configure it using the new Addon Wizard in 5 minutes
Screen shot 2013 05 26 at 3.49.35 AM We recommend: Resetting XBMC to clean and super configure it using the new Addon Wizard in 5 minutes
Step 24 : Under " Enter a name for this media source " field , type "fusion" without quotes , then press the " Done" buttom to finish.
Screen shot 2013 05 26 at 3.49.41 AM We recommend: Resetting XBMC to clean and super configure it using the new Addon Wizard in 5 minutes
Screen shot 2013 05 26 at 3.49.52 AM We recommend: Resetting XBMC to clean and super configure it using the new Addon Wizard in 5 minutes
Step 25 : Press the "OK" button at the bottom of the window to save the source.
Screen shot 2013 05 26 at 3.49.56 AM We recommend: Resetting XBMC to clean and super configure it using the new Addon Wizard in 5 minutes
Step 26 : Make sure that the " merger " is listed on the left side of the File Manager window , and then return to the main menu .
Screen shot 2013 05 26 at 3.50.03 AM We recommend: Resetting XBMC to clean and super configure it using the new Addon Wizard in 5 minutes
Step 27 : Go to " Settings " in the " SYSTEM" .
Screen shot 2013 05 26 at 3.50.17 AM We recommend: Resetting XBMC to clean and super configure it using the new Addon Wizard in 5 minutes
Step 28 : Select the "Extras" menu option on the left side of the window , press " OK " when prompted with the first message using .
Screen shot 2013 05 26 at 3.50.20 AM We recommend: Resetting XBMC to clean and super configure it using the new Addon Wizard in 5 minutes
Screen shot 2013 05 26 at 3.50.24 AM We recommend: Resetting XBMC to clean and super configure it using the new Addon Wizard in 5 minutes
Step 29 : Select " Install from zip file " is listed first.
Screen shot 2013 05 26 at 3.50.27 AM We recommend: Resetting XBMC to clean and super configure it using the new Addon Wizard in 5 minutes
Step 30 : Click on the "fusion" element of the server.
Screen shot 2013 05 26 at 3.50.30 AM We recommend: Resetting XBMC to clean and super configure it using the new Addon Wizard in 5 minutes
Step 31: Open the " hub- Wizard" .
Screen shot 2013 05 26 at 3.50.33 AM We recommend: Resetting XBMC to clean and super configure it using the new Addon Wizard in 5 minutes
Step 32: Select " plugin.video.hubwizard - 1.0.7.zip " file and poczekajkilka seconds for it to install, and then return to the main menu.
Screen shot 2013 05 26 at 3.50.37 AM We recommend: Resetting XBMC to clean and super configure it using the new Addon Wizard in 5 minutes
Step 33 : Go to "Programs" , then " The Extras" , if given the option .
Screen shot 2013 05 26 at 3.50.45 AM We recommend: Resetting XBMC to clean and super configure it using the new Addon Wizard in 5 minutes
Step 34 : Click on the " hub " Wizard addon listed .
Screen shot 2013 05 26 at 3.50.49 AM We recommend: Resetting XBMC to clean and super configure it using the new Addon Wizard in 5 minutes
Step 35 : Wait for a short promotional messages to the game , press Return or output to hide it later.
Screen shot 2013 05 26 at 3.50.53 AM We recommend: Resetting XBMC to clean and super configure it using the new Addon Wizard in 5 minutes
Step 36: Select the platform used , we chose the "Mac " for this example .
Screen shot 2013 05 26 at 3.50.57 AM We recommend: Resetting XBMC to clean and super configure it using the new Addon Wizard in 5 minutes
Step 37: Wait a few minutes to download the appropriate add- content configuration.
Screen shot 2013 05 26 at 3.51.02 AM We recommend: Resetting XBMC to clean and super configure it using the new Addon Wizard in 5 minutes
Step 38 : Press " OK" when prompted that the procedure has been completed, and then return to the main menu .
Screen shot 2013 05 26 at 3.53.36 AM We recommend: Resetting XBMC to clean and super configure it using the new Addon Wizard in 5 minutes
Step 39: Quit " XBMC ", by clicking the small power button on the bottom left or reboot the device , and then restart it, and voila!
Screen shot 2013 05 26 at 3.53.44 AM We recommend: Resetting XBMC to clean and super configure it using the new Addon Wizard in 5 minutes
Screen shot 2013 05 26 at 3.53.47 AM We recommend: Resetting XBMC to clean and super configure it using the new Addon Wizard in 5 minutes
Step 40: Enjoy a fully customized , pre-configured settings for XBMC .
Screen shot 2013 05 26 at 3.54.03 AM We recommend: Resetting XBMC to clean and super configure it using the new Addon Wizard in 5 minutes
If you receive a script dependency failures or errors in this place , make sure that XBMC works Frodo ; if not, then just upgrade to Frodo using the same procedure as in the installation manual for the specific device , and then follow this guide again later.
Congratulations ! It was only a matter of time before trying to figure out how to do it manually , hope you're happy , that gave you an automated process , you do not realize you needed. For sure you will now notice that the configuration of XBMC works a million times better than before , it's always good to have a nice clean setup on the page , only the latest , most add-ons know the ultimate pleasure. If you enjoyed this process , please help us by popularizing our website and tells all their friends about how easy it can refresh your XBMC installation from scratch. As usual , if you have any questions or comments ( so we would like to hear your comment) invite you to visit our forum at any time. Do not be shy forum both to our ever-growing expenses spot if you really like us much!
AcestreamPlayer
Attached is a plugin to play streams from a Acestream server.
Method :-
Acestream Player How to
1. If you do not have Ace Player HD (vlc) already installed on your pc - first uninstall any installed vlc mediaplayer. Next find and install :-
Ace_Stream_Media_2.2.4.1-next.exe
2. Start Ace Player HD (vlc). Configure player :
Tools -> Preferences -> All -> Interfaces -> Main Interfaces -> Select Web -> Exit
3. Configure host :
Find the path to the folder player by rightclick on the Ace player icon. Mine is (for example) -
"C:\Documents and Settings\username\Application Data\ACEStream\player\ace_player.exe"
Then do - ACEStream\player -> lua -> http - find file HOSTS. Insert the receiver ip (without #)
(Sometimes ACEStream deletes this change after pc reboot. So check.)
4. Install plugin AcestreamPlayer (attached). Start plugin. Config - insert server ip and
location of your user acestream url list. Default location /media/usb. Example list attached.
Check with BT Sport 2 (working in uk).
Regards, pcd.
priscube uploader tool
1 . Open Prismcube Box and activate the 2 pins near the USB port on the adapter WiFi
2 . Put the alarm image to FAT32 formatted USB stick and put in Prismcube Box
3 . Put Seriel cable from the computer to Prismcube Receiver
3 . Open Prismcube charger
4 . Press uldr.bin.uartboot_img file to the UART field in Prismcube Loader and select UART FIRMWARE
5 . Press the u- boot.bin file to Uboot field in Prismcube Loader and select Uboot FIRMWARE
6 . Now press the Start button , and then connect the power cord to the receiver prismcube
7 . Now charger start to transfer after the transfer is complete you see on the display UPDATE
8 . When you see ond display Delete USB Stick Boot put and wait
9 . When you start , you can remove the pin and close Prismcube Box
10 . Now you can upload photos as you want
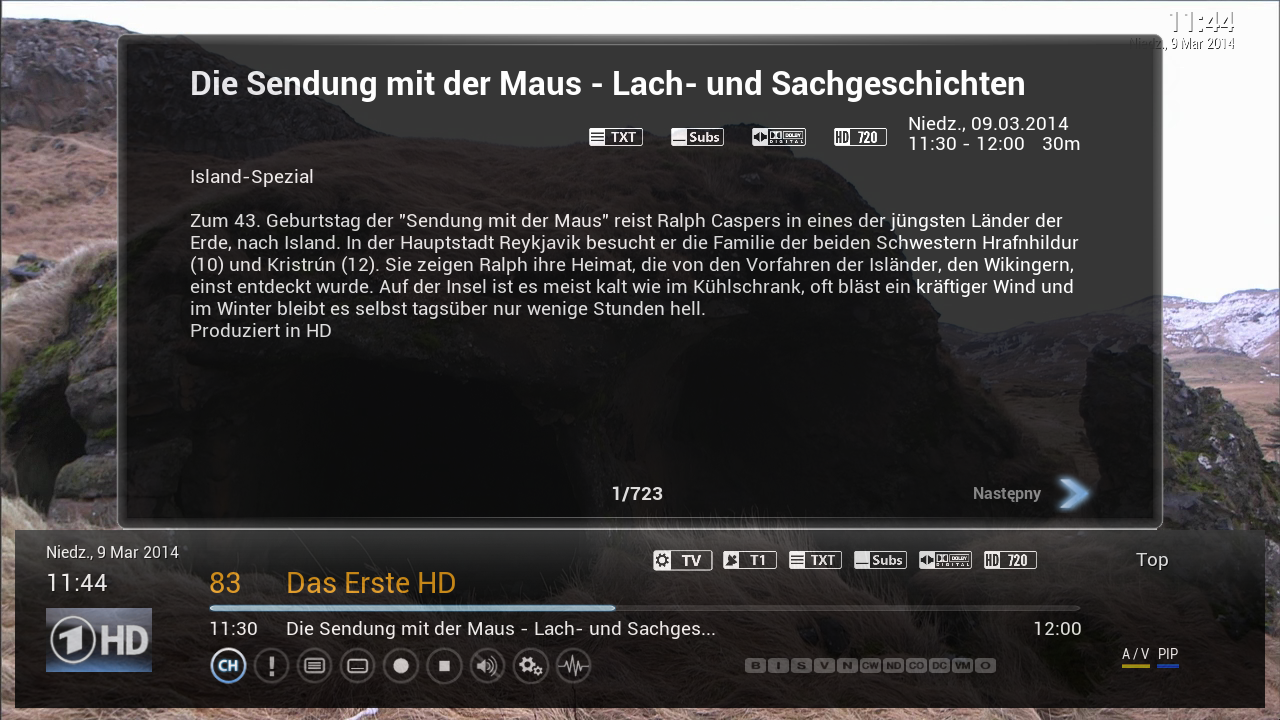
New-Prismcube Jet and 5000 DMIPS at this moment is the fastest satellite receiver in the world

As can be seen the receiver has no display, or no buttons. There is only a touch switch:

You will be able to buy a docking station receiver disk 2.5 "slot on the CI module and USB 2.0 ...
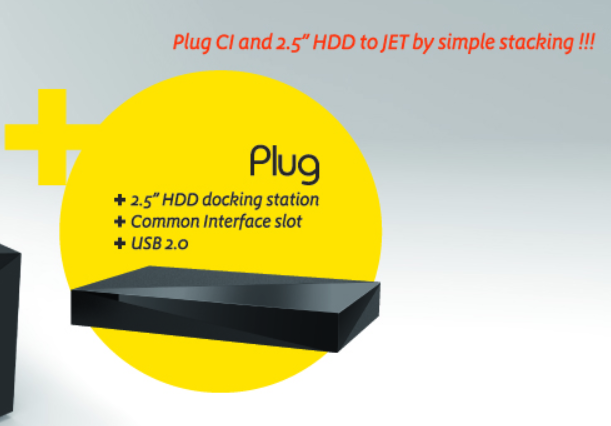

... And combine it into a single whole: PrismCube on ANGA COM 2014
Date : 2014. May 20 - 22
Booth Number : Hall 10.2 G28
Koelnmese, Cologne
We would like to invite you to grand launch event of PrismCube JET at ANGA COM 2014.
Please bring your name card and take part in the raffle event. We will randomly select 7 winner a day to take PrismCube Ruby.
Come to PrismCube booth on
- 20th May at 5PM
- 21st May at 5PM
- 22nd May at 12PM(noon)
http://prismcube.com/popupAnga.html

[VU+≈ Mambas HD Skin ≈

[align=center]
≈ Test on OpenPli 4.0 , OpenLD 1.3 ≈
≈ Work on all SH4 Enigmas DM & Vu+,,etc ≈
P.S.Thanks to Franc for xml.
<copyright>
<!-- ############## DONT REMOVE THIS DISCLAIMER ###################### -->
<!-- ########## Skin: MambasHD" Skin for Enigma2 ~ by mamba65 ~ Thanks for xml.by franc on www.************ ########## -->
<!-- ################# Version V1 ################################### -->
<!-- This skin and all it's graphics are free, do whatever you want with this skin but only for personal use! -->
<!-- You can modify and redistribute it as long as you keep this License for the skin and all of your modifications. -->
<!-- If you want to contact for support on crosatelite.com or www.************ -->
Added:
<b> Already integrated in Skin:
≈ Picons Weather,Run EPG Text,Picon Sat,Picon Prov,Cript,Emu,Fan,Cpu,Memory,Up Time in Info panel ≈
≈ How to get your city weather ≈
1~Open Weather Plugin from Plugins brwoser
~2~Press Memu from Keyboard
~3~Press Green Button (Add)
~4~Write you city name in (City) option
~5~Click yellow buttons (Search Code)
~6~Now select your city and press green button (ok)
~7~Press green button (ok) again
~8~Finish Exit from plugin bu pressing Exit button
Klikinite za proširenje...
~ Instal Skins ~
Please put the ipk in folder /tmp and install as
opkg install --force-overwrite /tmp/*.ipk</b>
HOW-PrismCube How to uninstall old softcam addon:
1 XBMC / Programs press "OK" on softcam addon and press "OK" to "stop"
2 Press the "OK" on the "delete"
3 Press the "back", press "OK" on the "Program Extras" and press "and" softcam
4 Select the Appendices
5 Select Uninstall, and then follow the next procedure to install a new softcam
How PrismCube to install a new softcam addon:
1 Copy "plugin.program.softcam_0.1.x.zip" on USB
2 Connect the USB cable to Prismcube
. 3 go to the XBMC part of the system - Accessories - Install the add-ons from a zip archive
. 4, go to Programs - softcam and run it. You can choose oscam and mgcamd.
VU+ Skin Black Transparente
Update 14.05.2014
Thx Maggy
ipk enigma2-plugin-skin-black-transparent-hd_0.2_all.ipk (924.8 KB, Download
PrismCube Plugin XBMCAddons.v6 - for running xbmc addons with enigma2
Hi Friends,


Attached is the new version v6 for plugin XBMCAddons.


Changes from v5 :


(1) All updates included
(2) Will not (hopefully) any more clash with other plugins using xbmc file names
(3) Online install of addons (converted xbmc plugins)
(4) Adult (18+) addons can be protected with parental protection PIN.


####################################
PLEASE NOTE
####################################


About 95 xbmc addons have been converted so far. These are now uploaded to the server for online install. Many of these have not been checked recently. So -


Please report any addon which is not working - or very slow.


Any xbmc plugin you are interested in - and not in the list - please ask to be included.


###################################
PURPOSE OF THIS PLUGIN:
###################################


Any available and working xbmc plugin can be easily converted for enigma2 images for using with this plugin.


####################################
BUG REPORT
####################################
If you get GS - post the crashlog.


If no crashlog -


Step 1. Select Debug 'Yes' in Settings (blue button). Select Save.


Step 2. Telnet command :-


init 4 && killall -9 enigma2 && enigma2>/tmp/e.log 2>&1 &


Step 3. Start plugin again. When you have the error - copy the file /tmp/e.log - zip or rar it - and post here.


All posts with error report must include a crashlog or e.log.
####################################
TIPS
###############################
EXTRA SOFTWARE:


Please install all software in Install Software (see screenshot.jpg). Always
install the latest "update" item. After installing "update" item - Restart enigma.


OE1.6 and images with python2.6:


Please install all software for OE1.6 - then reboot image.


ADDON SETTINGS:


Addon settings are in addon folder /resources/settings.xml. Many settings are not useful for enigma2. But you may change language, country etc. Put your chosen settings in default=. But for type="labelenum", put your choice as the last in the values list.


#########################
Addons are currently available for regions
#########################


International/English(en)
Sports
Adult(18+)
Albania
Arabic
Balkans
Belgian(fr/nl)
French(fr)
German(de)
Greek(gr)
Indian/Pakistani
Italian(it)
Netherlands(nl)
Nordic
Polish
Portuguese(pt)
Russian
Spanish(es)
Turkish(tr)
Vietnam and Asia Pacific


Regards, pcd.Thx pcdDownload
VU+ Wikipedia Version 2.1:RC5
Version 2.1:RC5
Update: YouTube Trailer nach Änderungen auf der YouTube Seite
THX kashmir
File Type: ipk enigma2-plugin-extensions-wikipedia_2.1rc5_mips32el.ipk (310.6 KB, Download
VU + Pingu_TM for VTI -by Czaja0 INSTALLATION: Put the downloaded package to / tmp , then log on to the decoder via telnet and issue the command : tar- xzvf / tmp / *. Tar.gz -C /
mod Black Hole - download HERE - after installing the first restart the GUI and then selection of a skin
Changes:
- corrected display of Picon
- corrected spa infobar
VTI mod 6.0.8 - 985b - download ping - vti - czaja0 - 985b.tar.gzpingu-vti-czaja0-985b.tar.gz"]HERE
NOTE: Changes: If you have previous versions before installing , please delete the folder PINGU_TM from / usr/lib/enigma2/python/Plugins/Extensions /
Changes:
- Additional opportunity to choose the style of " channelselection " in the plugin : ping , pingu_full , weather and Infinnity
- Fixes in movieselection ( someone asked about the selection bar ;-))
- Added infobar and secondinfobar dark
- Added test & infobar and secondinfobar man utd with this skin Premiere League ( thx masterpolo ) NOTE: To picony shown correctly to be used XPicon 8-bit transparent .
ZZPicony 8-bit or 32 -bit thrown into the folder ZZPicons
Thanks for kol.riki1966 and the rest for the creation of a skin cool .
AB-Prismcube SFTEAM 1.0.1 DEV Update 1 (10-05-2014)
Changes:
[NEW] Added Info Ecm with green button in a channel
Yesterday came the new version 1.0.1 which allows the push of the green button manufac ECM.Widac SFTeam more August attaches to our Primscube, but we'll see what next will
LCD4linux-Plugin - WLAN-Web / Pearl / Samsung - LCD-Display an der Dream [04.05.2014]
r6 (04.05.): Fix: Einstellung in Media-Fortschrittsbar ohne Funktion
Thx joergm6
ipk enigma2-plugin-extensions-lcd4linux_4.0-r6_mips32el.ipk (569.2 KB, Download
File Type: ipk enigma2-plugin-extensions-lcd4linux_4.0-r6_mips32el-nf.ipk (544.8 KB, Download
File Type: ipk enigma2-plugin-extensions-lcd4linux_4.0-r6_mipsel.ipk (570.0 KB, Download
VU+PictureCenterFS 5.15 10.05.2014
Thx @ shadowrider
rar enigma2-plugin-extensions-picturecenterfs_5.15_all.rar (621.9 KB, Download
VU + Pingu_TM for VTI and BH created a fashion skins PINGU_TM by @ riki1966 for VTI and BH
INSTALLATION [ : Put the downloaded package to / tmp , then log on to the decoder via telnet and issue the command : tar- xzvf / tmp / *. Tar.gz -C /
mod Black Hole - download HERE - after installation restart the GUI first and then the choice of a skin
Changes:
- corrected display of Picon
improved spa - infobar
VTI mod 6.0.8 - 985 - download HERE
NOTE: New version 6.0.8 VTI - 985 If you have previous versions before installing PINGU_TM please delete the folder from the / usr/lib/enigma2/python/Plugins/Extensions /
Changes:
- Additional opportunity to choose the style of " channelselection " in the plugin : ping , pingu_full , weather and Infinnity
- Fixes in movieselection ( someone asked about the selection bar ;-))
- Added infobar and secondinfobar dark
- Added test & infobar and secondinfobar man utd with this skin Premiere League ( thx masterpolo ) 05/08/2014
- Matched VTI Update 04/05/2014
- Fix crash taskscreenlist
- Other minor fixes ;-)
NOTE: To picony shown correctly to be used XPicon 8-bit transparent .
ZZPicony 8-bit or 32 -bit thrown into the folder ZZPicons
Thanks for kol.riki1966 and the rest for the creation of a skin cool .
enigma2-plugin-extensions-picturecenterfs_5.10_all [zip enigma2-plugin-extensions-picturecenterfs_5.10_all.zip (620.8 KB, Download
VU+ nStream VOD Webcenter OE-2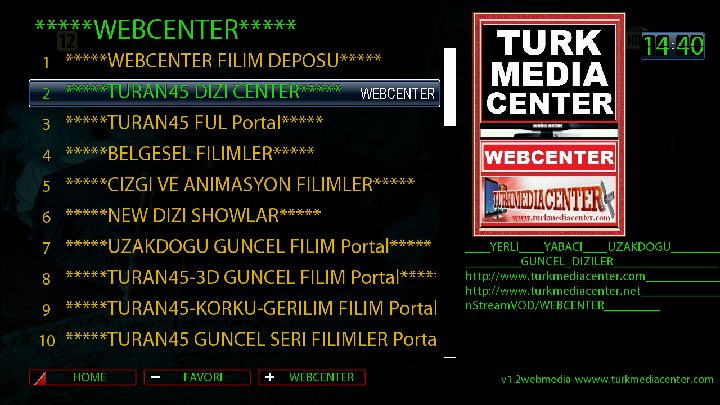


Iptv links faster and series of visual changes and editing for çalýþmasý made.
When we start with rtmp links now opens faster. more studies are edecekd temizlendi.iyileþtir unnecessary portions of the file.
From zip file and remove it (nstreamvod) as folders via FTP
/ usr/lib/enigma2/python/plugins/extensions/iç send
Save the device reset by CHMOD 755 in yaptýðýnýz
nstreamvod looking for kurulacaktýr.i.
03.03.2014 de güncellendi.
VU+ PictureCenterFS 5.04 03.05.2014
Update online
habe mal versucht noch was zu verbessern, wenn es jetzt langsamer läuft als eingestellt dann solltet ihr mal eure restliche Infrastruktur checken (oder probehalber paar Bilder mit normaler Größe auf Festplatte legen und testen)
oder einfach mal länger einstellen und prüfen ob es immer noch länger als eingestellt braucht....
Thx @shadowrider
http://speedy.sh/YgmMb/enigma2-plugin-extensions-picturecenterfs-5.04-all.rar "]Download[/URL]
