How to install Debian6 with CCcam+Oscam on AMD64bit

There are 17 replies in this Thread which was already clicked 8,894 times. The last Post () by Jeffzapp.

    • Official Post

    How to install Debian6 with CCcam+Oscam on AMD64bit
    First download the Debian 6 cd and make bootable iso
    You can download it from the following URL:
    64 Bit version
    Index of /debian-cd/current-live/amd64/bt-hybrid


    This will install the basic debian linux system on you're harddisk.
    Boot the computer from the CD you just created.


    Just press enter here to start the installation


    Select the language you prefer


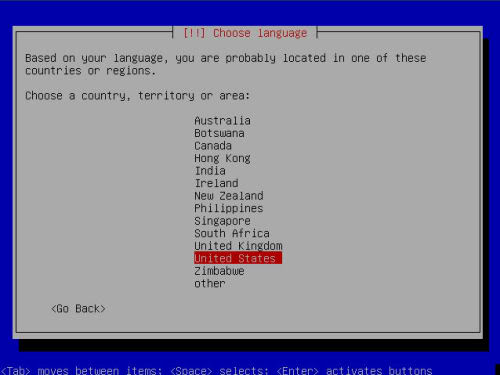
    Select the country you're in. Based on the language it selects a default country


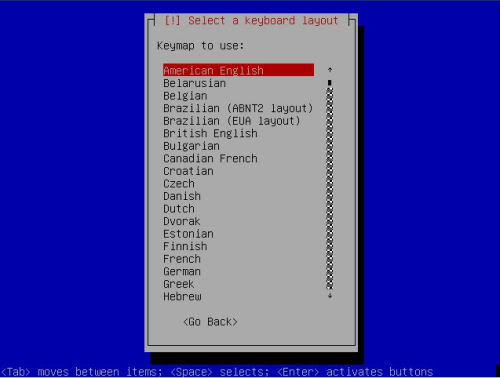
    Here you can choose the keyboard layout. Make sure you select the proper layout otherwise installation might prove to be quite tricky.


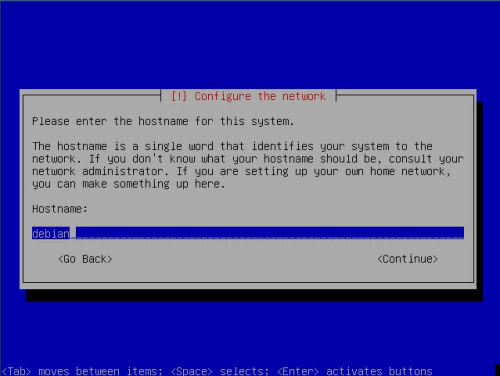
    Set up the hostname of you're server here. I prefer to set up the first part of my DYNDNS account info here.


    Here you must enter the domain name. In the example above, you can see i put dyndns.org here


    Next up is the partition guide. Here you must choose
    Quote:
    Guided - Use entire disk


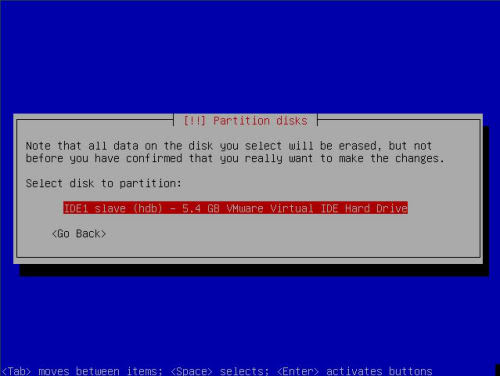
    Select the right harddisk. Usually in a stand-alone server, there will just be one entry


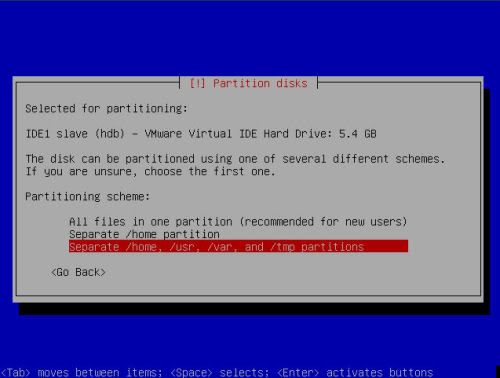
    Debian will let you choose to have everything in 1 partition, or have seperate partitions for the important directory's. One advantage of having seperate partitions, You cannot fill the root system by accident if you upload a lot to the home directory. Linux will NOT boot correct , if the root filesystem is full


    In the overview, You can check to see if all is set up correct before writing the changes to harddisk. Once you press finish, it will show you the next screen if you are really sure


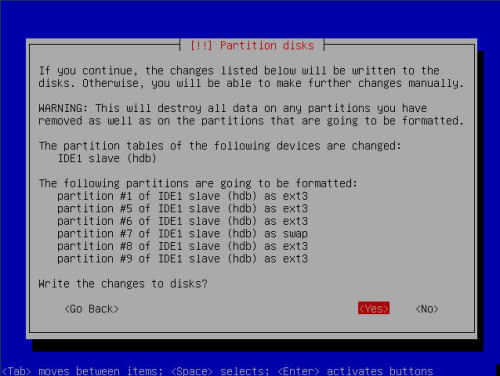
    Once you select yes, It will write the changes to harddisk and format all partitions.


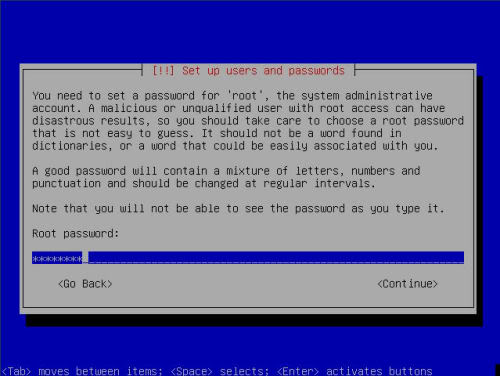
    Next you will have to enter the root password. Do not choose an easy to guess password if you want the server to be reachable from the internet. (if you want to use SSH for example to manage the server from work)


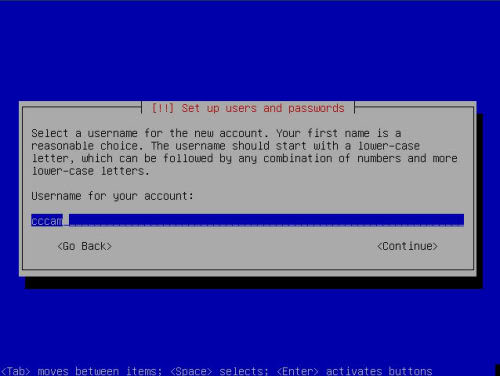
    Next is setting up an account to use for FTP transfer.Use username cccam for this.
    It's very important you use the correct username as some scripts depend on this name!!


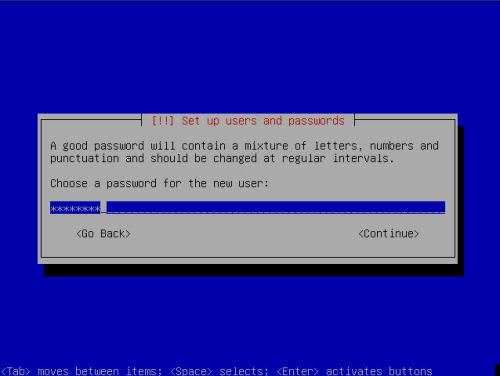
    Again, do not use a simple to guess password. This account can also be used for SSH


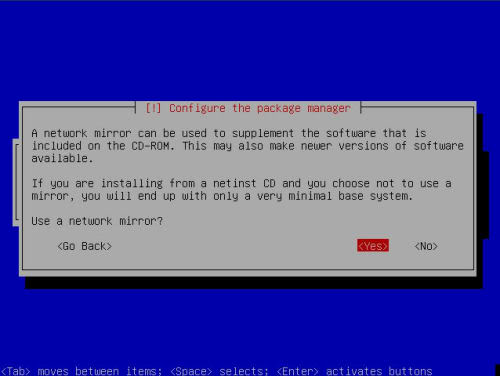
    When selecting a mirror, make sure you select a good, fast one


    In the software selection screen, select NOTHING !.. the base system is already installed.


    One of the last things it needs to know, is where to place the grub bootloader. Usually it is safe to place it on the MBR


    Congratulations, You have just installed a fresh new DEBIAN server


    Now we will install CCcam+Oscam with automated script
    This is an automated installation script for Linux PC based cardsevers and will Install CCcam 2.1.3+Oscam

    Before installation open the CCcamOscamInstall.sh script and fill in the owner name with your user login name for linux i.e. login username = server, put server next to owner.


    FTP all files CCcamOscamInstall.sh and cccamoscam_install_package to /tmp folder


    Now open putty terminal and login as root
    then type:

    Code
    cd /tmp


    Code
    chmod 755 CCcamOscamInstall.sh


    Code
    ./CCcamOscamInstall.sh

    Hit Enter that shoud install all files you need
    if ask y/n press y and enter


    CONGRATULATIONS!!!!!!!! Now you have oscam and CCcam server running on Debian

    Servers will not work untill you have written settings to CCcam.cfg and Oscam configuration


    All Credit to the original author, name unknown.


    Tested & working by myself.
    :tenb:

    • Official Post

    sir. i try to put my ip adress
    192.168.1.6:8888 ----------------> show 403 Forbidden Access denied


    plese help


    Have you added your configs yet ? if so edit these lines in your oscam.conf file to allow web info connection.


    Code
    httpport           = [COLOR='#FF0000']8888[/COLOR]
    httpuser          = [COLOR='#FF0000']admin[/COLOR]
    httppwd          = [COLOR='#FF0000']admin[/COLOR]
    httpallowed    = [COLOR='#FF0000']127.0.0.1,192.168.0.0-192.168.255.255[/COLOR]
    • Official Post

    Hi Ten


    When I go to here (Index of /debian-cd/current-live/amd64/bt-hybrid) it lists 6. Is there any one of them in particular I should use?


    Regards


    The netinstall option is no longer in that link so i would use this instead buddy,


    Code
    http://www.debian.org/CD/netinst/


    Or even easier forget the cd & download it through this,


    Universal USB Installer latest version


    No need to install any gui version for what your going to use it for imo.

  • Hi Ten


    Could you point me in the direction of the latest or most stable Oscam file that is compatable with this setup. Ive looked in the Latest Oscam link at the top but i'm a bit confused as there is so many versions. Ive had this installed and running flawlesly for a week running 2 locals and all of a sudden it just wont see 1 of the cards. Checked everything seen no problems. Swapped the hub and cards to my backup and up and running strait away with no problems (as of yet)


    This version for (AMD64) comes with oscam build 6012, My back up is Debian for Intel and that installs with Oscam svn 7029. I think the svn7029 seems far more stable. If you could help that would be great.


    Regards

  • Hi Ten Below,


    Can you ad also the date command to the oscam check script this coms very handy for us all:


    process=`ps auxwww | grep oscam | grep -v grep | awk '{print $1}'`DATE=`date`

    • Official Post

    Very easy to setup one your self buddy.. For example this cron will check Oscam every 5 minutes, your script is in /var/script named OscamCheck.sh


    Open terminal window with putty, paste this command and press enter;


    Code
    crontab -e


    Paste this line into the config and press Ctrl + x then y to save..


    Code
    */5 * * * * /var/script/OscamCheck.sh


    Reboot the server..


    http://linuxsat-support.com/li…263-linux-cron-guide.html

  • cccamoscam_install_package in /tmp
    #put this script in /tmp then chmod 755 this script


    OWNER=sjcserver2.zapto.org this with username
    echo


    is that all i change on the file or do i need to enter sjcserver2 next to owner next to ech $owner

    • Official Post

    Before installation open the CCcamOscamInstall.sh script and fill in the owner name with your user login name for linux i.e. login username = server, put server next to owner.


    cccamoscam_install_package in /tmp
    #put this script in /tmp then chmod 755 this script


    OWNER=sjcserver2.zapto.org this with username
    echo


    is that all i change on the file or do i need to enter sjcserver2 next to owner next to ech $owner


    You add the username you use to login to the debian, not your hostname.. So if sjcserver2 is your login username, you add that to the script..

  • Before installation open the CCcamOscamInstall.sh script and fill in the owner name with your user login name for linux i.e. login username = server, put server next to owner.


    You add the username you use to login to the debian, not your hostname.. So if sjcserver2 is your login username, you add that to the script..


    so I just add it the once

  • got it into root but now get this error message and oscam wont autostart at boot
    error while loading shared libraries: libssl.so.0.9.8: cannot open shared object file: no such file or directory
    so I type in apt-get install libssl0.9.8 and get this error
    unable to locate package and couldn't find any package by regex


    none of the guides work properly from this site for debian any more. could someone update them please

  • here u go Install ddclient in Debian


    #aptitude install ddclient


    This will complete the installation


    Configuring ddclient


    If you want to reconfigure you seetings use the following command


    #dpkg-reconfigure ddclient


    You want to make sure it runs as a service and monitors changes in ppp–something that the install wizard doesn’t cover.


    Edit the configuration file /etc/ddclient.conf


    #vi /etc/ddclient.conf


    # Configuration file for ddclient generated by debconf
    #
    # /etc/ddclient.conf
    pid=/var/run/ddclient.pid
    protocol=easydns
    use=web
    server=members.easydns.com
    login=yournamehere
    password=’password’
    *.your.domain


    If you can’t find the public IP address, then you can have ddclient check your public IP address from the web by editing /etc/ddclient.conf and making it use the web by saying


    use=web


    or


    use=web, web=checkip.dyndns.org/, web-skip=’IP Address’


    Save and exit the file


    Restart ddclient service using the following command


    #/etc/init.d/ddclient restart

  • Hi Everyone


    Anyone got the knowledge or time to edit the script so it will work on Debian 7? I have tried to install it a few times and it seems to install flawlessly but files are missing I.E the emu folder and also the permissions are not set correctly in usr/local. Seems like the updates in Debian 7 wont work with this script.


    Regards


    Jeff

  • master G

    Added the Label Article

Participate now!

Don’t have an account yet? Register yourself now and be a part of our community!