Posts by Eminem

    How to make own picons - video tutorial by jav@


    programs: picon menager 1.24 and photoshop cs5


    in this tutorial I made HD picons 100x60


    I use the native language but that's not important, more important is to watch the film frames


    p.s. sapasa100 is my youtube nick name


    In this tutorial we are using cable or RS232 cable miniusb hyper terminal and get into the BIOS Receivers Dreambox.


    1- The Dream and the computer can connect to the RS232 cable or MiniUSB


    2- Hold the button in front of the receiver and turn on the receiver. If you work right after a few seconds on the OLED device and so can you tone up your finger off the button.


    193.jpg


    3- Now to Start / All Programs / Accessories / Communications cut and run HyperTerminal program.


    Windows 7 and Vista, Hyper Terminal program, you must download and install from here.


    http://www.hilgraeve.com/htpe/support/htpe7.exe


    4- The following window appears, enter the name of my DM800 and click OK.


    194.jpg


    5- Now in the Connect To window, select the correct COM.


    195.jpg


    6- The COM1 Properties window opens and the image and click OK.


    196.jpg


    7- Now get into a white screen, after 2 seconds, press X button on the keyboard so you could change to this page.
    (This only works with the keyboard, and a shift of direction for the - and + Enter to change the parameters and conditions for use)


    139.jpg


    140.jpg


    141.jpg


    142.jpg


    143.jpg


    by N@SER
    Good luck

    Temporary injunction
    09.05.2011
    Temporary injunction against Satco Europe
    Dream proceeds against trademark infringements


    Dream Multimedia, the leading supplier of Linux-based set-top boxes, has brought a temporary injunction against Satco Europe GmbH. At the Anga Cable show in Cologne, Satco presented, among other items, its TV player VU+ Duo, and promotion for this infringes the brand rights of Dream.


    Satco is illegally using the designation „Enigma“, which is a registered brand name of Dream. In an advertising flyer, Satco promotes the Linux operating system installed on the VU+ with the designation „Enigma 2“. Moreover, the designation „Enigma“ appears when the set-top box boots up.


    With the temporary injunction, the district court in Düsseldorf prohibits Satco from using the designation „Enigma 2“, including offering for sale set-top boxes equipped with operating systems so designated. Contravention of the court order can lead to a fine of up to 250.000 Euros, or a prison sentence of up to six months.


    This court order is only the first step. In future, Dream also plans to proceed against other producers who illegally use brands owned by Dream.


    Dream spokesperson Alpaslan Karasu: „We will definitely no longer stand around and watch while competitors exploit our good name in order to sell their products.“


    district court of Dusseldorf, 2a O 140/11


    The district court of Dusseldorf enacted the temporary injunction without hearing of Satco Europe.
    Satco Europe can object to this.

    Code
    [url=http://www.dream-multimedia-tv.de/en/temporary-injunction]Temporary injunction | dream-multimedia-tv.de[/url]

    Low FAT stands for Low Level automatic FAT Image flashing,
    extraction and booting.


    Step 1: Choosing and preparing the LowFAT device
    ------------------------------------------------


    The DM 7025 can ONLY boot from a CF Card and the
    other Dreamboxes boot only from an USB stick
    if these are formatted in FAT and the Bios is
    changed accordingly.


    Alternatively these devices can now be used together with
    LowFAT to put an image into the Flash of your Dreambox.


    For all Dreamboxes it is sufficient to have a
    image with latest secondstage loader #83 (or
    #82 on the 800) in Flash, which uses also the
    latest kernel.


    You format the needed device of your Box on a PC in FAT
    (or FAT32 if the device is too big for FAT).
    Preferable use the HP USB Bootdisk Tool for formatting,
    this assures that the device is also properly
    partitioned to be bootable by the Dreambox bios.


    An USB stick will be accepted from the Bios of your
    Dreambox as a bootable device when it is detected
    on a Windows PC as "mass storage device" und
    NOT as "usb stick yxz", because such sticks are
    likely to fail on booting. If it still fails, try
    putting an USB hub in between (passive hub is
    sufficient, no need for extra power via the hub),
    or try another stick.


    Be aware that for booting the IO speed of the
    LowFAT device is NOT a criteria, it is the stick's
    controller chip which has to answer fast enough
    on the USB bus the device scan of the bios to
    be bootable.


    Remark: For some devices an increase of the
    rootdelay=10 value to 15 seconds helps to
    improve detectability of device by the bios.
    You will have to manually edit the autoexec_*.bat
    file of your Dreambox on the LowFAT device for
    doing this change.


    The LowFAT device hast to be 512MB or larger,
    and needs to be formatted in FAT or FAT32 (in case
    the device is too big for FAT).


    LowFAT might work on smaller devices then 512MB
    if you re-create the lowfat.lfi
    container file before extracting your
    first image. This can be done on the yellow button
    in the LowFAT Plugin.


    140MB is the minimum adviceable container size
    (comapeable to about 64MB Flash), but this is
    not supported and will probably work only
    with small images to be extracted into such
    a small container.


    You can also use the LowFAT Plugin when
    bootet from Flash to create larger container
    files then the default 256MB
    (which is equivalent to about 128MB Flash Memory)
    up to the maximum possible 2048MB container size.


    Next extract the LowFAT_X.X.X.rar on the root of
    this newly formatted device.


    And with extract of the rar file I mean extract,
    not only coping the rar file on the LowFAT device !


    Optionally you can copy the choosen nfi image file
    also in the root of the LowFAT device. This image will
    then be extracted during boot and booted.
    But you can extract nfi images also later with
    the LowFAT Plugin on the Dreambox.
    Then simply the Flashimage will boot.
    If you want to have this nfi image in Flash
    (and hence use LowFAT for Flashing your Dreambox),
    you have to rename the nfi file to Flash.nfi.

    Attention: ANY other name will be extracted and booted
    from the LowFAT device instead of flashing it!


    Step 2: Changing the Bios of your Dreambox
    ------------------------------------------


    Besides the limitation of having an
    OE 1.6 Image with an up-to-date secondstage
    loader and Kernel in Flash, there is no limitation
    on choosing your Flashimage.


    There is nothing else to be installed on your
    Dreambox (no plugin ipk), except that you
    now have to change the Bios:


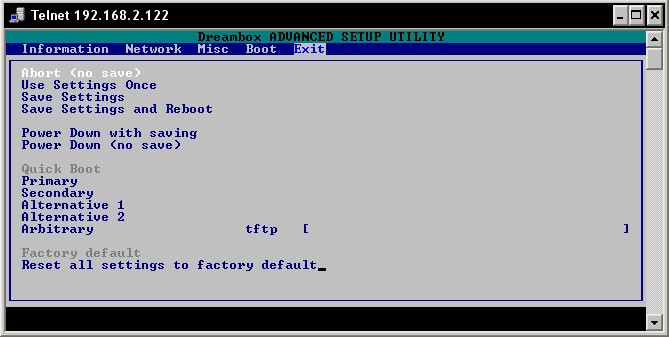
    For changing the Bios that the lowFAT device boots
    directly the same entries apply as for the
    Wally West Plugin.


    In case of the dm7025 this means:


    primary boot source : cf [/autoexec_dm7025.bat ]
    secondary boot source : flash


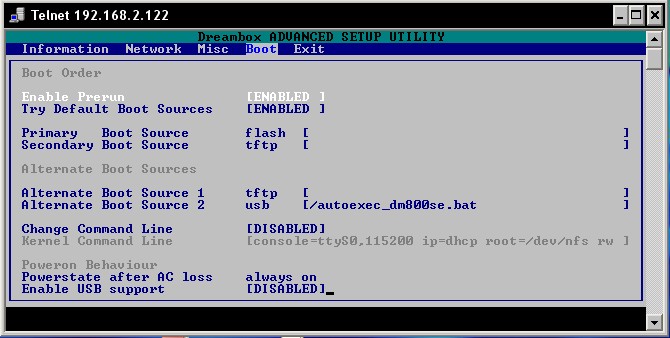
    In case of the dm800 this means:


    primary boot source : usb [/autoexec_dm800.bat ]
    secondary boot source : flash


    In case of the dm800se this means:


    primary boot source : usb [/autoexec_dm800se.bat ]
    secondary boot source : flash


    In case of the dm8000 this means:


    primary boot source : usb [/autoexec_dm8000.bat ]
    secondary boot source : flash


    In case of the dm500hd with USB modification this means:


    primary boot source : usb [/autoexec_dm500hd.bat ]
    secondary boot source : flash


    If you have problem changing the bootsource between
    flash/cf/usb then try the page up/down keys when
    your cursor is positionend in the line.


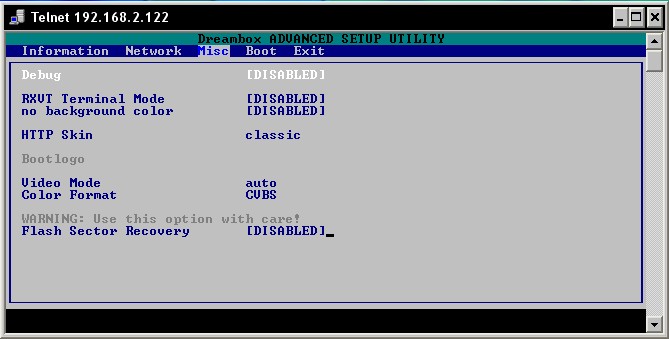
    USB Support has to be enabled in Bios in all cases
    (well except on the 7025 where only CF boot is
    supported) and the prerun can be disabled in
    case you have problems when the box hangs
    when turned on.


    You should DISABLE the change the console command
    string in the bios, because
    LowFAT has its own console command string in the
    autoexec_dm*.bat files.


    After these Bios changes save your settings
    and reboot the Dreambox.


    Step 3: Image extraction and choosing for booting
    -------------------------------------------------


    If plug the prepared LowFAT device to your Dreambox
    and boot the Dreambox the first time and have put also
    an nfi image file in te root of the LowFAT device
    this nfi file will be converted to an lfi image
    container file which is an ext3 formated file
    located in the root of your device and containing
    the entire content of the nfi file which is then booted
    as soon as the LowFAT Logo dissapears.


    Alternatively if the image file on the LowFAT device
    was named Flash.nfi this image will be
    put to Flash instead of creating a container on
    the lowFAT device and then this new Flash image
    will be booted after flashing it during the boot
    process.


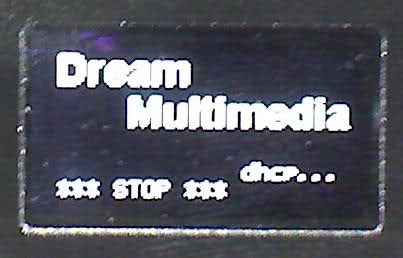
    This image conversion or flashing takes a few minutes,
    during which you will see the LowFAT Bootlogo
    on your TV screen.


    This LowFAT Logo will also explain that LowFAT 3.3 is
    now Donationware - which means it is still Free
    Software but if you want you can donate to the
    shown bank account via EU bank transfer.


    If the conversion or flashing is completed
    (the nfi file is deleted from the LowFAT
    device on completing the conversion or flashing)
    and on the TV screen you should see the
    LowFAT bootlogo dissapear.


    Turn off your box only if it doesn't continue
    booting automatically after a few minutes.
    If you then turn it on again the converted
    image should boot now from the LowFAT device or
    the newly flashed image should boot from Flash.


    The Flash image will be completely unchanged
    during the image extraction procedure or when booting
    a LowFAT image, only if you boot the Flash image
    the LowFAT Plugin directory will be created
    also in Flashimage to mount the LowFAT device at
    /usr/lib/enigma2/python/Plugins/Extensions/LowFAT
    and show the LowFAT Plugin also within the
    Flash image.


    If you want to boot another image from
    your LowFAT device simply move it again to
    your PC, copy the new nfi file to it and
    repeat the procedure ob booting with an nfi file
    on it which triggers the image conversion.
    Alternatively you can also FTP the nfi image to /tmp,
    /MB_Images or /hdd/backup/Flashbackup and choose
    it in the LowFAT Plugin for extraction with the
    green button and choosing Extract nfi.


    So only the current lfi file will be bootet, until
    a new nfi file is found for conversion. Then this
    one is converted and booted. For switching
    between ecisting images or the Flash you can select a
    different lfi image or Flash within the LowFAT
    Plugin for booting (choose image to boot
    and press OK).


    Step 4: Checking the Filesystem(s)
    ----------------------------------


    If your lfi file has a corrupt filesystem,
    or you are experiencing read-only mounts of
    the image on the LowFAT device you can do a
    Filesystemcheck when yor are
    booted from Flash within the LowFAT Plugin.


    After checkign the lfi container file
    you THEN can also try a normal FAT Filesystemcheck
    of the LowFAT device on the PC.


    Step 5: Networkproblems
    -----------------------------------------

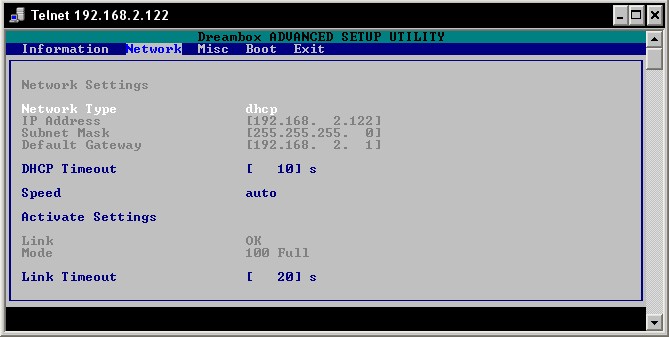
    If the network of your Dreambox doesn't work
    when you are booted with LowFAT then you can test
    it in the config Menu of the LowFAT Plugin
    on yellow button.
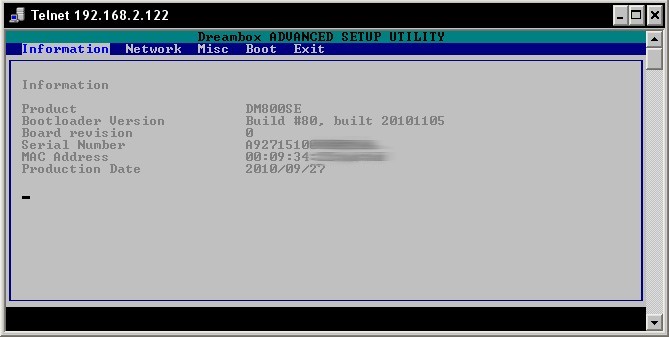
    If there the Mac address is shown as 00:00:00:00:00:00,
    then you can use the Networkfix there. For this
    you maybe have to boot without LowFAT to lookup
    in telnet with ifconfig or within the bios
    the Mac address of your Dreambox.


    ===============================================
    Have fun simply booting and flashing
    images with LowFAT !
    ===============================================
    And if you like it -
    consider donating for the continuous development !
    ===============================================


    by gutemine

    Running Enigma2 under Qemu


    Installing Qemu (Windows)


    Download and install Qemu and to improve performance, KQemu.


    Download the Gentoo based image.


    In order to start the virtual machine, create a batch file in the same folder as gentoo-i686.qcow2 with the following content:


    echo off
    set QEMU=c:\program/qemu
    set QEMU_AUDIO_DRV=sdl
    set SDL_VIDEODRIVER=windib
    set SDL_AUDIODRIVER=dsound
    %QEMU%/qemu.exe -L %QEMU%/pc-bios -std-vga -localtime -m 512 -usbdevice tablet -soundhw es1370 -usb -hda gentoo-i686.qcow2 -redir tcp:2222::22
    Adjust the value of QEMU so that it points at your qemu installation and doubleclick on the batch file.


    Installing Qemu (Linux)


    I recomend google for this one. If you happend to run Gentoo, there is a very nice guide on how to install KVM (a modified version of qemu that uses a kernel module called kvm to get acceleration close to a native installation)


    Download the Gentoo based image.


    In order to start the virtual machine, create a bash script in the same folder as gentoo-i686.qcow2 with the following content:


    #!/bin/bash
    export QEMU_AUDIO_DRV=sdl
    export SDL_AUDIODRIVER=alsa
    kvm -std-vga \
    -localtime \
    -m 512 \
    -usbdevice tablet \
    -soundhw es1370 \
    -usb \
    -name Gentoo \
    -hda gentoo-i686.qcow2 \
    -redir tcp:2222::22
    Running enigma2


    Once the virtual macine is booted, you can either log in (as root, password: gentoo) to its openssh server that has been mapped to port 2222 (recomended) or directly in the qemu window. By choosing the later method, you will not be able to view the logs since enigma will run ontop of the console, and the keymap might not be correct (us).


    Execute /usr/local/bin/enigma2.sh and watch the spinner apear in qemu.


    Navigation is done using the arrow keys and you can press the Enter key in order to bring up the infobar. Since enigma was designed to be used with a remote, alot of the actions are not mapped to a keyboard (Menu button for example).


    Issues I've resolved


    A lot of the code is depening in special hardware (DVB device, audio output) and it refers to static device nodes that are either outdated or only used by the dreambox (/dev/fb/0 /media/discs /media/hdd etc). Python will throw a few exceptions and some will abort the execution.


    When compling with sdl, enigma crashes since skins.py tries to open gFBDC.


    Since the path to xml.etree.cElement is not the same in python-2.4 (requires external library) as in 2.5, python will throw an exception and abort.


    Patches needed to compile the C++ code can be found in /usr/local/portage/media-tv/enigma2/files (emerge -av enigma2 will reinstall everything and overwrite the python scripts that I've changed in order to get it running.

    Screenshots


    34145fbdef5cdfa818.jpg


    8c29f99f495ea.jpg


    df3a1a5257107fa5281a001.jpg


    by linuxsat-support - N@SER

    HD channels are in two categories, it is a bunch of other types that are DVB-S DVB-S2, you can tell I say that with this method using the Tuner Dreambox DVB-S is like Dreambox 600, 500S, 500 +, 7000, 7020; HD channels from DVB-S, open face.


    To find out what type of HD channels are DVB-S and DVB-S2 which one of you to see to understand.

    Code
    [url=http://www.flysat.com/]Home - FlySat Satellite Chart[/url]


    After Channel HD DVB-S type, I found, for example, Al Jazeera HD channels and you can open.
    After you Share receiver or on a PC hard drive on your Reciver, Dreamboxs Enigma1 a feature that you get the HD channels do not broadcast, So you're on the HD channel and the Record button to start recording from the call control network PC or hard drive inside your Dream.


    Apparently you do not see any, but when you go to capture video recordings that tell you to easily network and you should see my channel.


    If you want to see the channel, Quick to capture and record the file with Windows Media Player 12 or VLC Media Player open.
    This way you can simultaneously record a time and see the HD.beer10
    Of course, I could say that this tuner device to press credentials, which I really do not do it.
    Good luck
    by N@SER

    This training will answer nearly all Enigma 2 Receivers
    The method is very simple:
    1- Open a web browser
    2- Enter the following in the browser address bar

    Code
    ip dreambox/grab


    For example: xxx.xxx.xxx.xxx/grab
    xxx instead you must enter an IP receiver
    3- Right click and select Save picture to save my photos
    4- So you can save your favorite image format
    jpeg format, use the following command

    Code
    http://xxx.xxx.xxx.xxx/grab?format=jpg


    PNG format, use the following command

    Code
    http://xxx.xxx.xxx.xxx/grab?format=png


    Good luck
    by N@SER - Dreamboxat

    Any way by this plugin, the image of your backup images Plugin not installed.
    This is particularly important in respect Dreambox 800HD, otherwise you are faced with Dream Multi Media Error error.
    Warning: Only images that have their own backup plugin the receiver into your

    Talent Please enter the following command at the beginning and the Chek OLED brightness or light use.

    Code
    cat /proc/stb/lcd/oled_brightness


    To change the light OLED screen you can use the following command

    Code
    echo 30 > /proc/stb/lcd/oled_brightness


    For example I would enter 30, you can enter the number 0-255.
    Good luck
    by N@SER - dreamboxat

    If you encounter this error, do not worry at all.


    Because of this error, remove the boot loader on the flash memory device is not a hardware problem.
    To solve this problem, use the following up of the DreamUP.
    RS232 cable to your receiver and unplug the receiver from the cable lan
    Be careful when installing the image, Badsector option is enabled.
    The problem is easily solved.


    by N@SER
    Good luck

    Note: Original Mac address starts with 00:09:34:xx:xx:xx


    There a simple way to fix your DM boxes, but how this is done depends on the image you are using.


    [1] on all Pli images Flubber/ Garnet/ Helenite / Iolite;


    a) with telnet or DCC go to /var/etc on your clone box and create a file callled chg_mac.sh (command in telnet is 'touch chg_mac.sh)


    b) now edit chg_mac.sh with say "vi" so the command is vi chg_mac.sh or in DCC use FTP to edit the file


    c) now add this content to the file


    Code: Select all
    /sbin/ifconfig eth0 down hw ether 00:0a:03:43:51:4a
    /sbin/ifconfig eth0 up


    you can change the 00:0a:03:43:51:4a to an unused MAC address (pick a number but not the same as anything on your LAN)


    d) now change the attributes of this file to chmod +x or 755 so it is executable under *nix - right click in DCC and select change attributes


    e) make a file called init in your /var/etc directory - in telnet touch init


    f)now edit init with say "vi" so the command is vi init or in DCC use FTP to edit the file


    g) now add this content to the file


    Code: Select all
    if [ -x /var/etc/chg_mac.sh ]; then /var/etc/chg_mac.sh ; fi
    /bin/setupnetwork


    NOTE: if you do not use the name chg_mac.sh for the mac data make sure you change this init file to reflect the name you choose - else this will not work as your file will not be run at boot time.


    h)now change the attributes of this file to chmod +x or 755 so it is executable under *nix - right click in DCC and select change attributes
    Your Adsense Code


    i) now reboot the DM


    Another Method


    Create a file called init (no extension - if you do it in notepad, it will add a .txt extension. the way around this is to save as init & put inverted commas around it - eg "init" & that will save it as init without any extension


    Put this line into the file -


    Code: Select all
    ifconfig eth0 down; ifconfig eth0 hw ether 00:09:23:47:97:E5; ifconfig eth0 up


    Then upload the file to VAR/ETC & reboot


    Thanks to hayalet18 @ Satsharing