MP3 Browser After the end of a movie trailer or the movie player goes back to the plugin, regardless of the settings of the Image
Posts by ZYGA
-
-
New Movie Browser After the end of a movie trailer or the movie player goes back to the plugin, regardless of the settings of the Image
-
VU + SOLO2 drive VERY IMPORTANT! Ensure sufficient thickness chosen because disk drives are available with a thickness of 7-9-12mm and then it can be a problem with assembly (drive will be touched with damper) the someone here on the forum but I bought the disc 2.5cala despite proper installation flap touched the disk. I personally have a disk with a thickness of 7mm so no problem there bylo.Proszę look for when buying a 2.5'' drives with a capacity of 1.5 - 2 TB
because they have a height of 13 - 15mm (depending on the model and the company) drives larger than 1TB capacity are "high" and can have up to 15 mm high and then the problem is guaranteed. Anyway, who wants to observe each purchase a new drive to SOLO 2 to carefully measured the gap to the extent possible to attach your cover to avoid rework this mocowania.DYSKI THAT WORK WELL, this 3TB as well 4TB.Do SOLO2 this drive Samsung HN-M101MBB 1TB 5400rpm SATA 2.5 inch Internal Hard drive: Amazon.co.uk: Computers & Accessories Natomniast you do not see the drive as a whole only a part of it can not be initiated from the remote control, as one 3TB partitionBut there are some ways that was seen as one partition as a whole
The first way is to connect the 3TB hard drive to a PC with win7 convert it to GPT and formatted as a single partition
such a disk mounted in the VU + and will be seen as 3TB
This is a good way, because you can drive at any time remove from the tuner and hook it to the PC.
PC will see all of its contents, and any time you can rip the contents to the PC at least 10x faster than the lost tunerThe second is to hook your Dreambox (in my case it was DM800se) with an installed image and it Newnigma2 v4.0.2
initiate the remote disk without any problem in formats and is seen as a whole, as 3TB
This disk has przepinamy ready to VU + and it is seen as 3TB -
VolPlusFS- Change the volume of the box via Plugin
Code
Display More[COLOR='DarkOrange']this little plugin does nothing more than a way to control the volume to provide Situation: the remote is changed, the volume on FB adjusted volume level on the TV Box volume is adjusted for any reason on the fly no way to boot a PC or similar this plugin in the menu timFS in the Navibar or MQB, is always a volume control has also changed in FB ready[/COLOR]Thx shadowrider
-
VU+Plugin XBMCAddons - for running xbmc addons with enigma2 OE 1.6!
From the attached please ftp :-
plugin.py -> plugin folder /XBMCAddons
xbmcaddon.py -> /usr/lib/enigma2/pythonand install the ipks.
Many addons will work. If something does not work telnet :-
init 4
killall -9 enigma2
enigma2>/tmp/e.log 2>&1 &then run the plugin. Look at the end of /tmp/e.log if any item is missing. Try to find it and install.
Good night, pcd.
Thx pcd. >> Download <
-
VU+LCD4Linux-plugin Release from 02-09-13. >> Download <
-
-
Bootlogos for Black Hole or for odher image.


zip Bootlogo.zip (718.6 KB, 2 >> Download <<
zip Bootlogo for other images.zip (713.2 KB, 2 >> Download << -
VU+ Movie Broswer-Plugin Version 2.2rc7
Thx kashmir
ipk enigma2-plugin-extensions-moviebrowser_2.2rc7_mips32el.ipk (729.0 KB, 4
Type: zip piconSat.zip (355.9 KB, 1 >> Download < -
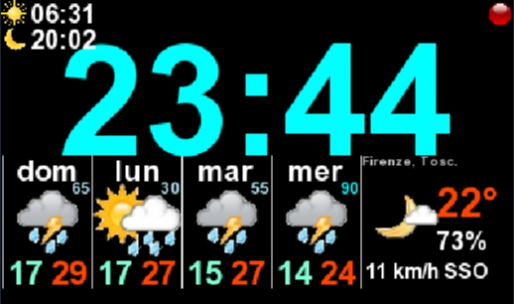
VU+ LCD4 Linux One more with 5 screens:
Global info
Weather and Time
Mini EPG
Next events
Tuner info
PLus standby set 1st LCD screen to time/date and 2nd screen weather 4 days. -
HOW-VU + Plugin flashexpander great plugin called flashexpander which allows you to assign hard disk or USB memory to be used as a flash - I use the 80GB hard disk drive and flash memory of my current never exceeded 50% utilization. Also, the use of file sharing blackhole use a hard disk or USB memory as RAM. It can be used to increase the stability of the Duo?
That is, together with cacheflush and MEM swap. -
VU + XBMCAddons v.2.2.r2
New: - Teledunet, Myvideo_de, a new item in the Script-modules-v3.zip, 1Channel.v2, Movie25.v2All the necessary files are in atachment
-
VU+ Plugin TV Spielfilm Version 5.5rc6
thx kashmir
ipk enigma2-plugin-extensions-tvspielfilm_5.5rc6_mips32el.ipk (1.59 MB, 1 >> Download <
-
Welcome azee here you how to install gap7, 2 Uploading image VU + BH 2.0.5 galaxy and stare 7.2 Upload image bh2.05 to flash. Together with the gap 7.2 will take you a little over 10 minutes. Before installing the first mount the gap all the equipment so that you can upload vti, 6.0 do not need to upload it to the flash. Just install meoboot in / media / usb, then use the plug-VU + Image Downloader (green), download the updated image from the server vti SDG, store it in the / media / meoboot / MbootUpload and install meoboot. clicks of the remote control, without the use of PC .. Description of the installation for VTI 6.x.x
1 After uploading the image update the software. At the end, I have not restart the box - press exit and exit the menu
2 Gap7_x.tar.gz copy the file to / tmp and install by VTI Panel - tar.gz installer After the restart the gui.
3 After restarting the menu plugin execute that giant panel for your model, and the image patch that replace all default settings gap. Without this giant will not work properly!
4 Finally, remove the / tmp all tar.gz files, if leftDescription of the installation of Black Hole 2.x.x
1 After uploading the image update the software. At the end, I have not restart the box - press exit and exit the menu
2 Rename the file to gap7_x.bh.tgz gap7_x.tar.gz, then copy it to / tmp and install it using the BH Green Panel - Accessories - Installation packages bh.tgz. After the restart the gui.
3 After restarting the menu plugin execute that giant panel for your model and image patch that replace all default settings gap. Without this giant will not work properly!
4 Finally, remove the / tmp all files bh.tgz, if leftDescription of the installation for OpenPli 3.0, opensp, openATV
1 After uploading the image update the software. At the end, I have not restart the box - press exit and exit the menu
2 Gap7_x.tar.gz copy the file to / tmp and install via Dreamexplorer, who had charge of the feed. After the restart the gui.
3 After restarting the menu plugin execute that giant panel for your model and image patch openpli that replace all default settings gap. Without this giant will not work properly!
4 Finally, remove the / tmp all tar.gz files, if leftDescription of the installation for OpenVuplus 2.1 (official image)
1 Grab the feed connector Software Manager
2 Copy the / tmp dreamexplorer_mips32el.ipk package (see link below), install it in / dim plug and restart the gui
3 After reboot, copy the file gap7_x.tar.gz to / tmp install by Dream-explorer and restart the gui
4 After restarting enigma in the menu plugin execute that giant panel for your model vti patch that replace all default settings gap. Without this giant will not function correctly.
5 Using the Software Manager complement the missing packages, which will appear in the message after selecting the browser plug-in
4 Finally, remove the / tmp all tar.gz files, if leftConcluding Remarks
Before installation, unpack the zip archive. Tar.gz files and bh.tgz depending on the amount of available capacity emerge together, or separately.
Gap not contain keys or emulators!
Softcam for VTI and OpenPli available with feed for the Giant Black Hole Panel. Softcam for all the images you can download and start using Glass Universal Cam Manager.
To change, use the plugin Spinner Spinner Setup (long blue).
Picons HD should be installed in the directory / media / usb / Picon and pikony lcd in / media / usb / piconlcd. Before installation, check the disk and pen drive is properly mounted file, otherwise you can fill flash.
The updated image online (for Black Hole, VTI and OpenPli) is required min. 12 MB of free space in flash (not installed in multiboot and the universe).
Parental control in MediaPortal is the default password 0000
Due to the large size, skins and Dmconcinnity_gap HDGlass_gap are above separate files. Before you install any of them, remove the other skins, leaving only the default skin. -
Sherlock Plugin VU + to BH by Matrix10
For those who do not know,
Installation:Copy the file to / tmp
The installation manual >> Green >> Yellow >> BH manually install packagesPlugin can be found at long pressure on the blue button.
or to configure the plugin, specify a key to Plugin.się showed >> Download < -
VU+ Plugin -Extrachannelselection.
for
enigma2-plugin-systemplugins-extrachannelselection_for_blackhole_2.6_all.ipk
enigma2-plugin-systemplugins-extrachannelselection_for_domica_2.6_all.ipk
enigma2-plugin-systemplugins-extrachannelselection_for_hdmu_2.6_all.ipk
enigma2-plugin-systemplugins-extrachannelselection_for_openpli_3.0_2.6_all.ipk
enigma2-plugin-systemplugins-extrachannelselection_for_pkt_2.6_all.ipk
enigma2-plugin-systemplugins-extrachannelselection_for_vti_2.6_all.ipk>> Download < oraz tu do pobrabia>> Download < -
azeemmir You can install
-
Movie Browser Version 2.2rc6
-
egj_soldier added a new file:
QuoteDisplay MoreEPG YouTube Trailer & Translator Plugin
by kashmir - FHD Edition by KiddaC - Version 1.4:rc1
21.06.2019
- Some fixes
-
VU+ Plugin - MP3 Browser Version 0.5rc1:
Thx kashmir
VU+ MP3 Browser Version 0.5rc1: