

Sky uk sends epg data only in opentv format, there is simply not enough memory to process it on a dm500. Most other boxes now have plugins that do capture the data via satellite, maybe its time to upgrade.
Posts by master G
-
-
Nabilosat Black Hole images for DM7025, DM800 and DM8000 include an exclusive feature: download the weekly SKY UK EPG via satellite, and have it integrated to Enigma2. This guide will briefly show how to complete the procedure.
The EPG is downloaded from the satellite signal available from the radio channel Hip Hop, frequency 11778, symbol rate 27500. There are 2 options to zap to this channel.
1) Edit your settingsOpen your settings with your favorite editor, and add the radio channel to any TV bouquet. This procedure will give you the option to quickly zap to Hip Hop
2) Enable Alternative Radio mode
Press MENU, and browse to SETUP>SYSTEM>CUSTOMIZE and set Alternative Radio mode to YES. This procedure will give you the option to zap through radio channels in radio mode, and have the full MENU active like in TV mode

Then, press the Blue button to access to Nabilosat Blue Panel

And press it again to open the Nabilosat E2 settings. Move the cursor to Nabilo E2 EPG, and press OK

The Nabilo E2 EPG Settings panel will open

Press the red button to modify settings. Here you can enable/disable the loader, select the path where to save the EPG, and select the Hip Hop radio channel. Press the red button again to save your settings. Enigma2 will be restarted.

Once Enigma2 has restarted, go back to Nabilo E2 EPG settings, and press the yellow button. The channel list will popup. With the keys left/right set each channel to YES if you wish to download its EPG, or to NO if you wish to exclude it. Scroll up/down with the keys up/down. The Update channel feature, available through the green button, is useful when the provider completes a channels retuning. The list will be automatically updated, upon pressing the green button, and will include new channels and new frequencies.

The previous steps complete the setup, and are necessary only to modify settings such the destination path or channel list.
To download the EPG, simply zap to Hip Hop, wait for the popup window
Wait for the countdown to be over.

You will have updated your Sky UK Weekly EPG, and you will be able to browse through it with GraphMultiEPG, MultiEPG and the other Enigma2 EPG features.
-

Devices suitable for flashing : Elite and Premium
What is new :
- MyTube plugin (YouTube)
- Multimedia fix for various formats by sattomy
ATTENTION: Use AzUP v1.1 for Flashing this version of Enigma 2 into Your devices !!!
-
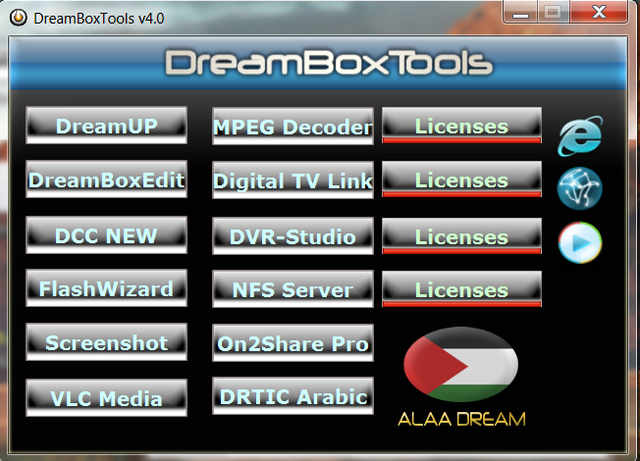
- DreamUP V1.3.3.2 NEW
- DreamBoxEdit V3.0.0.0 NEW
- Dreambox Control Center v2.95
- bitcontrol? MPEG Decoder v3.0 (MPEG-2, H.263, MPEG-4) NEW
- bitcontrol? Digital TV Link v3.0 NEW
- DVR-Studio Pro v1.56
- Screenshot Tool v1.71
- NFS Server v4.3 NEW
- VLC media player v0.9.6
- FLASHWIZARD v6.3
- On2Share Pro v4.3.0.7 NEW
- DRTIC Arrabic Subtitle Converter v1.0 NEW
-
DM_Sims
################################################## ########## ##
Release 0.1 : August 20th, 2010
################################################## ########## ##DM_Sims tool is built to help you to :
DETECT:
- To DETECT which Dreambox sim card you have (Original, Sim 1.0, Sim 2.0, Sim 2.01 and Ferrari)FIX:
- To FIX the sims v1.0 corrupted by the "BombKill" SSL released.
- To FIX the sims Ferrari DM800 corrupted by the "BombKill" SSL released.
- To FIX the sims v2.0/v2.01 corrupted by the "BombKill" SSL released (NOT YET - MISSING 2.01 team data)COMMUNICATE:
- To SEND ADPU Commands to the sim cardsMAC COPY/CLONE/BACKUP:
- To CHANGE MAC address of your sim card v1.0 if you use multiple DM800 on the same network.
- To READ the MAC/DATA from your sim card (Original or Sim v1.0, v2.0, v2.01, Ferrari)
- To COPY/CLONE to a Sim v1.0 your MAC/DATA (Clone your card) -
Here's another handy tool for DM users.
just pick up your notebook and connect via wireless
to the DM and you have everything in front of you.

-
I assume that if you have a solo you substitute 'duo' for 'solo' in line 3 ???
Will be investing in one of these also mate, have just posted a how to for the solo HERE -
VU+ Solo USB Flash Process
✅ Preparation
- USB Drive: Formatted to FAT32
- Image File: Downloaded USB version of desired firmware (unzipped/unrar’ed)
📂 Step 1 — Folder Setup
- Insert USB drive into your computer
- Create a main folder named:
vuplus - Inside
vuplus, create a subfolder named:solo
⬇️ Step 2 — Copy Firmware Files
- Unpack the downloaded image
- Copy these 3 essential files to the
solofolder:boot.binkernel_cfe_auto.bin(or similar kernel file)root_cfe_auto.jffs2(or similar root file)
🔧 Step 3 — Start Flashing
- Insert USB into front USB port of VU+ Solo
- Press and hold the reset button on the rear
- Power on the VU+ Solo (if not already on)
🔴🟢 Step 4 — Monitor Flashing Progress
LED Indicator Status Action Standby LED = RED Flash process started Wait USB LED flashing Reading files from USB Do not interrupt USB LED stops flashing Writing to internal memory Continue waiting Standby LED turns GREEN Flash complete ✅ Safe to remove USB 🔄 Step 5 — Final Boot
- Press rear reset button again (short press)
- VU+ Solo will reboot into Enigma2 setup process
- Follow on-screen setup instructions
⚠️ Important Notes
- Do not remove USB or power off during flashing
- Ensure correct file transfer — only the 3 required files in
/vuplus/solo/ - If process fails, re-format USB to FAT32 and restart from Step 1
📝 Summary
- Format USB → create /vuplus/solo folders
- Copy 3 firmware files to /solo
- Insert USB → hold reset → power on
- Wait for standby LED green
- Press reset to boot into setup
-
How to use.
Get your serial number from the Service Menu -> System Information.
The Serial Number will be a 10 digit number.
Serial Number Example: 0363829178
Enter the 10 digit number into the Box Serial Number field.
Click on the Convert Button
BoxKey Hex Field displays
15AF97BA0363829178 DECIMAL = 15AF97BA HEX
CCcam.cfg requires you to enter spaces between each HEX value in the BoxKey.
So enter the BOXKEY like this
BOXKEY: /dev/sci0 15 AF 97 BA
Add the following SMARTCARD CLOCK FREQUENCY to CCcam.cfg
SMARTCARD CLOCK FREQUENCY: /dev/sci0 3570000
Insert White Card into the TOP Card Slot to begin viewing.
-
Astra 2B 28.2 has another beam pointing at nigeria, so no chance of UK receiption im afraid mate.
-
This guide should fit Most Images
VU+ SOLO ? USB HDD INSTALLATION
Guide using Power Of Dream Image 4-9-2010
Check a USB hard disk is recognised.
Press MENU on your remote control.
Select SETUP

Select SYSTEM

Select HARD DISK

Select FILE SYSTEM CHECK


Now go back by pressing EXIT once
Select INITIALISATION
If the disk is not ready for use with the system the menu will allow you to press the RED button.
Press the RED button to format it as an ext3 linux drive, this may take some time!
It may reboot the box on completion or it may restart the GUI.
If it restarts the GUI it may fail rendering the video correctly, you may need to restart the box manually.The hard disk is now ready to use.
Credit for this guide to Mickle026
-
First of all you need the source files for manually upgrading python.
Copy these to you /tmp directory on your box via ftp
The files you should copy are:
python-zlib_2.6.4-ml8.0_mipsel.ipk
python-shell_2.6.4-ml8.0_mipsel.ipk
python-compression_2.6.4-ml8.0_mipsel.ipk
python-html_2.6.4-ml8.0_mipsel.ipk
enigma2-plugin-extensions-xmltvimport_1.0-r20_mipsel.ipk (OR NEWER VERSION)Ok now to install, You need to telnet to your box
in windows START>RUN>telnet {enter}
or START>RUN>cmd {enter} telnet {enter}
type: open 192.168.1.xx {enter} The ip of your machinelogin to your box with
username: root
password: whatever your password is or press enter if you dont have oneNow do the following commands.
root@vusolo:/tmp# ipkg install python-zlib_2.6.4-ml8.0_mipsel.ipk
Installing python-zlib (2.6.4-ml8.0) to root...
Configuring python-zlib
root@vusolo:/tmp# ipkg install python-shell_2.6.4-ml8.0_mipsel.ipk
Not downgrading package python-shell on root from 2.6.4-ml8.1 to 2.6.4-ml8.0.
root@vusolo:/tmp# ipkg install python-compression_2.6.4-ml8.0_mipsel.ipk
Installing python-compression (2.6.4-ml8.0) to root...
Configuring python-compression
root@vusolo:/tmp# ipkg install python-html_2.6.4-ml8.0_mipsel.ipk
Not downgrading package python-html on root from 2.6.4-ml8.1 to 2.6.4-ml8.0.
root@vusolo:/tmp# ipkg install enigma2-plugin-extensions-xmltvimport.ipk --nodep
s
Installing enigma2-plugin-extensions-xmltvimport (1.0+git30+c591350f9b5900da893c
ac9104ccea096701fa4e-r20) to root...
Configuring enigma2-plugin-extensions-xmltvimport
root@vusolo:/tmp#In your FTP browser goto :
usr/lib/enigma2/python/Plugins/Extensions/EPGImportEdit this file on the PC (you need to ftp it): (metapad or unix editor in windows like Uedit)
epgdat_importer.pyOn line 11 change the storage place for the epg
tmppath = '/tmp' to tmppath = '/media/hdd' or tmppath = 'media/sda1' for usb penFtp it back to where you got it from
Go back to the top level directory and go into /etc, create a folder called epgimport
ie,
/etc/epgimportNow copy these files to that directory
rytec.sources.xml
rytec.channels.xmlNow reboot your box/stb !!!
Goto Your Plugins and find EPGImport

Launch the plugin

Goto Sources by pressing the BLUE button

Choose the EPG's you wish to load by pressing OK on them. Then Press the GREEN button to keep the changes.
The EPG will now load daily at 5.45am.
You can manually load it now by pressing the YELLOW button as shown below:
Press OK on YES on the first screen

You cannot do anything now until the IMPORT is finished , This ONLY happens on maual import. The automatic import runs in the background.
A couple of screenshots showing it working


If you press EPG on the TV Channel , Ie no menu displayed or only the info bar you will get this screen below.

Tutorial Over!!
There is a newer enigma2-plugin-extensions-xmltvimport_1.0-r20_mipsel.ipk file avaliable, r21 has been released, but r20 still works fine.
Rytec plugin HERE
Credit to this guide to mickle026
-
-
-
-
-
-
-
-


