


This guide sets up stored satellite positions on a motorised dish using DiSEqC 1.2 — first configuring the tuner and satellite (Stage 1), then using the satfinder and positioner to physically move the motor and store each position (Stage 2). You'll repeat both stages once per satellite you want the motor to remember.
Stage 1: Configure the tuner and satellite
- Go to Main Menu \ Setup \ Service Searching \ Tuning and press OK on TUNER A.

- Use the L/R keys to change Configuration Mode to advanced. Move down to SATELLITE and use L/R to select the satellite you want to add.
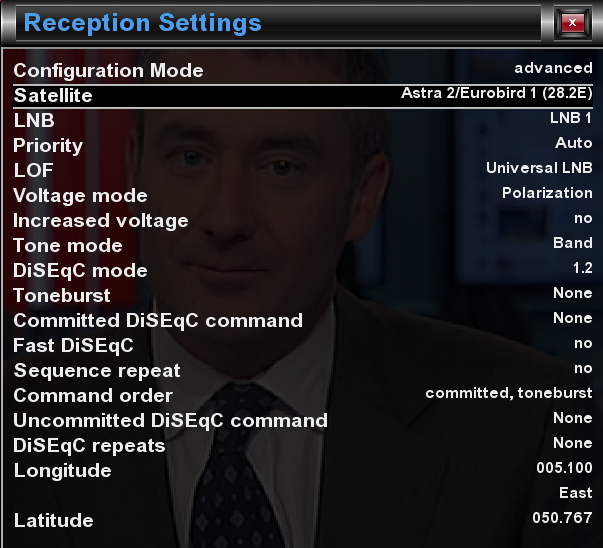
- Go down to LNB and select LNB 1 with L/R. Ensure Diseqc Mode is set to 1.2 (other settings can be left at default). Scroll down to LOF and set it to Universal LNB using L/R.
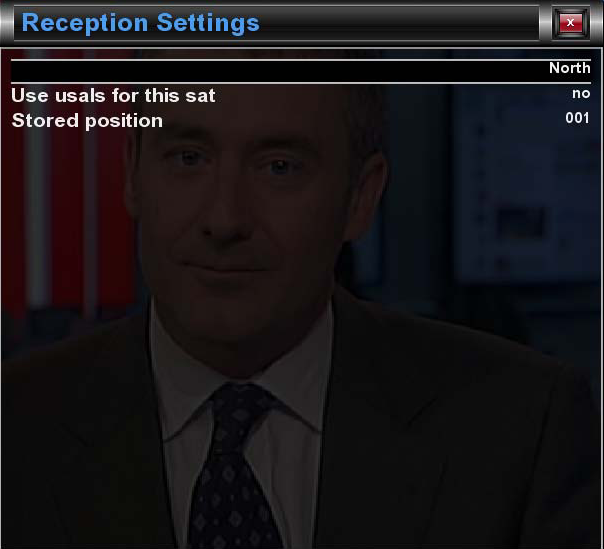
- Underneath that, set Use USALS for this satellite to no using L/R. Go down to Stored position and set the position number you want this satellite to appear at (e.g. 001, 002, etc.) using L/R, then press OK. Press OK again to save.
- Repeat this stage for every satellite position you intend to set up, before moving on to the positioner setup in Stage 2.


Stage 2: Move the motor and store each position
- Go back to Main Menu \ Setup \ Service Searching \ Positioner Satfinder. Go down to Satfinder and press it.
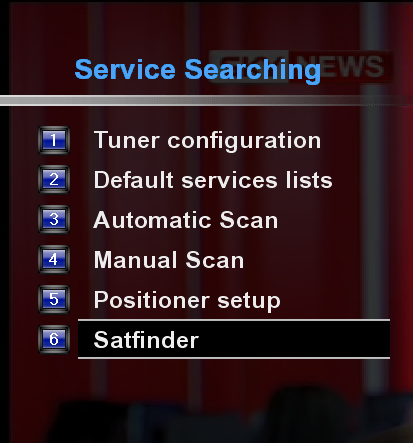
- Press OK on Satfinder (see next picture).
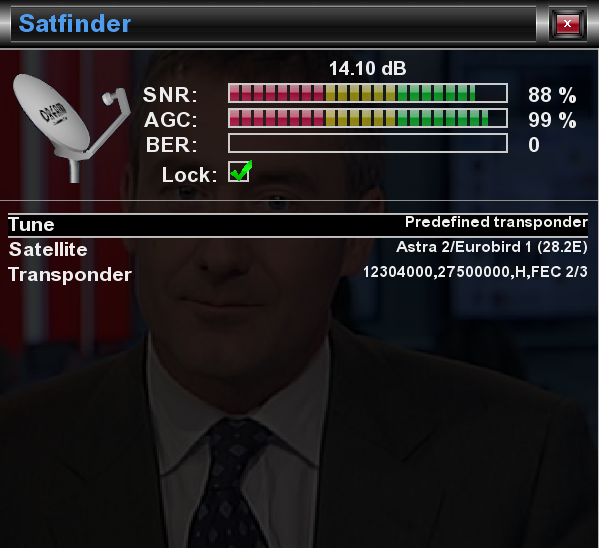
- Using L/R, select Predefined or Manual transponder as required. Go down to Satellite and use L/R to select the satellite to place at this storage position, then press OK. Once you have a lock, exit this screen.
- Go back to Main Menu \ Setup \ Service Searching \ Positioner setup.
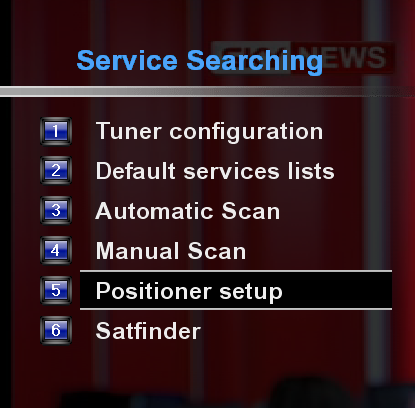
- Press OK on Positioner setup (see next picture). Go up to Tune and press the Red button. Select the satellite you had a lock on, and change the transponder to match the one shown in the satfinder step.
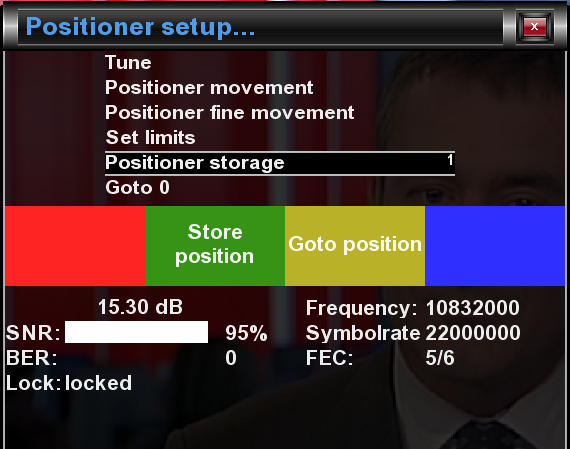
- Go down to Positioner storage. Use L/R to set the position number to store, then press the Green button to store that location.
- After storing a position, go back to Satfinder, change to the next satellite you want to view, get a lock, exit, and repeat the positioner steps above — once per position, matching what you set up in Stage 1.



Replies 1
master G
Discussion of article Stored Position Tuner Setup: